This page includes affiliate links. If you click and purchase, I may receive a small commission at no extra cost to you to support this blog.
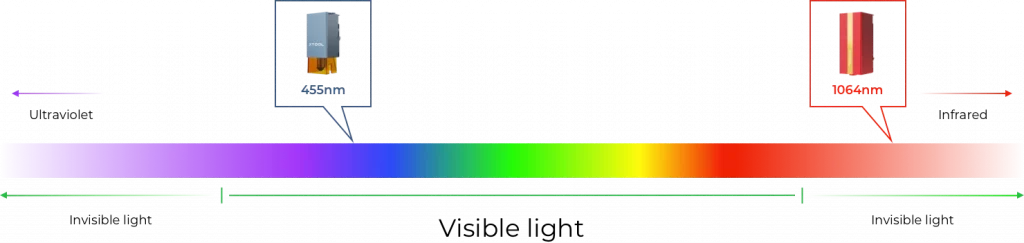
The xTool D1 Pro 20W is one of the most powerful diode lasers currently available. With the 2-in1 kit, you get a 20 (or 10) Watt 455nm blue laser which is ideal for cutting and engraving materials such as wood, leather or cardboard and in addition also a second module with a 1064nm Infrared Laser. In this post, I will give you a detailed review of the pros and cons of the xTool D1 Pro and test its cutting and engraving capabilities with various materials.
Intro
When I started with laser cutting a few years ago, I briefly consider buying a diode laser because of their lower prices and simpler operation compared to CO2 lasers. But at that time you only found diode lasers with a maximum power of 5W. While 5W is enough to do some engraving, cutting 3mm or 1/8 inch wood will require very slow speeds and multiple passes. I was mainly interested in cutting and so decided against diode lasers and instead became a member of a local maker space with two CO2 laser cutters.
Since that time, there has been a lot of development in the diode laser market. First, machines with 10W optical power output appeared on the market and earlier this year xTool and Atomstack presented their 20W diode modules.
The new xTool D1 Pro 2-in-1 Kit which launched in August includes a 1064nm infrared laser in addition to the 455nm blue laser. The special thing about the infrared laser is, that it can engrave and cut metals. Blue diode lasers and also CO2 lasers (except high-power machines with oxygen or nitrogen assist) can only mark the surface of steel and titanium with the help of marking spray.
Full disclosure:
I was contacted by xTool and asked if I wanted to test their new D1 Pro 2-in-1 laser kit and write a review about it. I received the laser for free (but paid the taxes and customs fees myself). Nothing was agreed upon regarding the content of this review. You will get my honest opinion of the machine.
Tech Specs – xTool D1 Pro 2-in1 Kit
| Laser Output Power (455nm blue laser) | 20W (10W version also available) |
| Laser Output Power (1064nm infrared laser) | 2W |
| Max. Engraving Speed | 400 mm/s (15.75 in/s) |
| Working Area | 430 x 390 mm (16.93 x 15.35 in) |
| Max. Workpiece Height | 50 mm (2 in) *can be extended with risers |
| Focusing Method | Manual focus |
| Operating Software | LightBurn or xTool Creative Space |
| Input voltage | AC100-240V, 50/60Hz |
| Weight | 5 kg (11 lbs) |
| Warranty | One Year |
Note: With diode lasers, it is important to take a close look at the laser power specifications as some companies will advertise the laser (input) power and not the optical output power. So if you find a 20 W laser for 300 EUR/USD, I guarantee you that the 20 W will only be the input power (which means the power the laser consumes) and the output optical power (which describes the power of the laser beam) will only be around 4 to 5W.
Unboxing and First Impressions
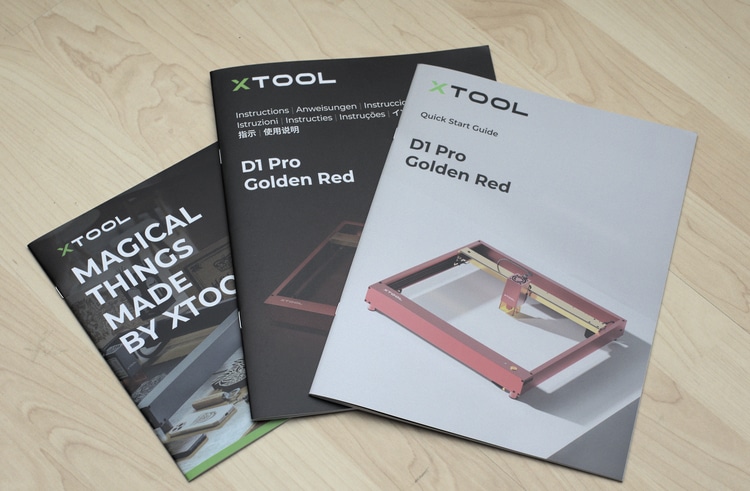
The D1 Pro arrived in two well-packed boxes. Protective foam inserts separate all the components. The first thing you will see are two black envelopes. One contains the manual, a quick-start guide and a small brochure with projects for inspiration. The other one is a set of sample materials.
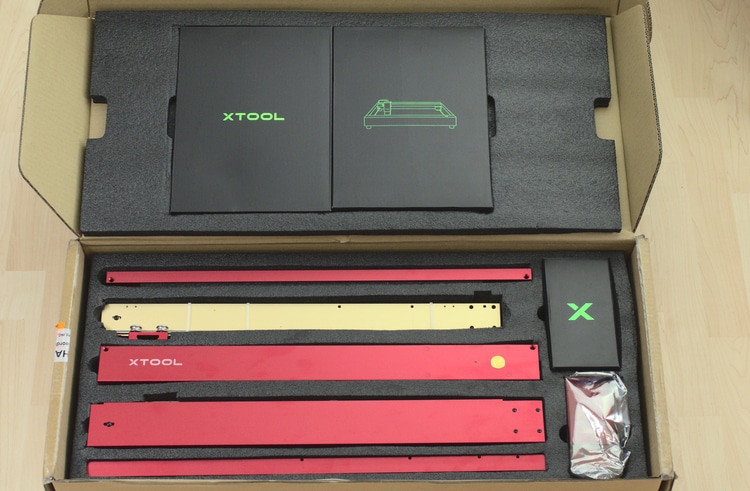
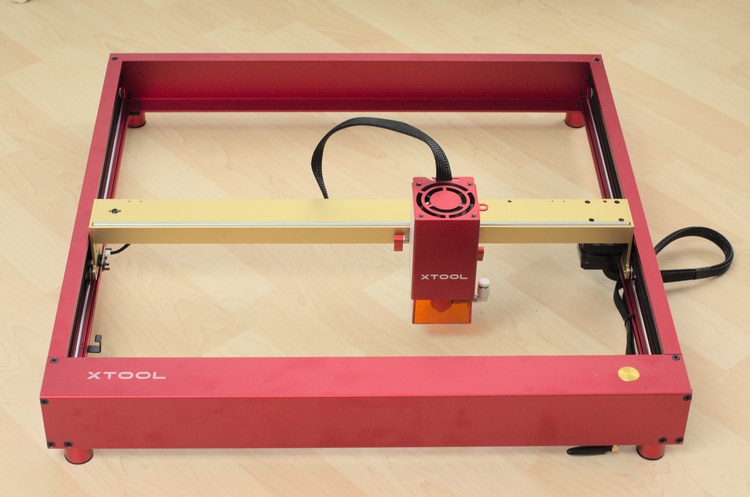
Below is a second layer with all the other parts. The first thing that caught my eye was the beautiful red anodized aluminum of the frame components. Even though I think that the primary function of every tool is to perform well at its task, I also enjoy working with nice-looking tools.
In addition to the laser itself, you get safety goggles and a box with screws, tools and some other small parts needed for the assembly.
Assembling
All the tools needed for assembly are included with the exception of some scissors or wirecutters for cutting a few cable ties. The included manual is clear and xTool also published a tutorial video showing the complete assembly. So I won’t mention all the details of the assembly process, I will just focus on the parts I found noteworthy.
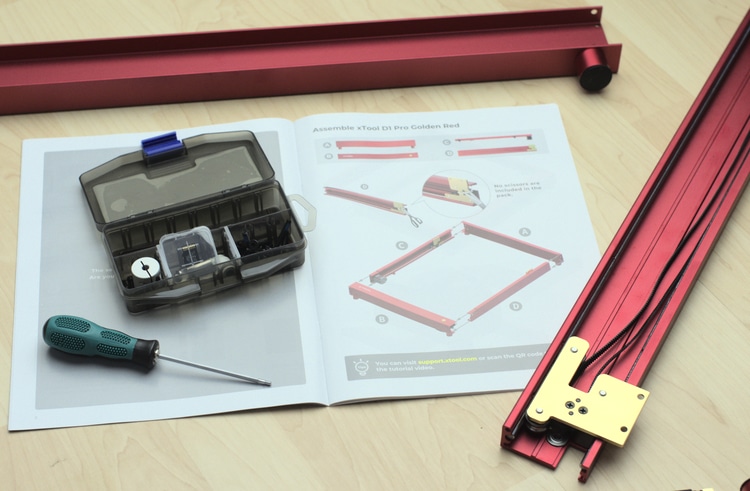
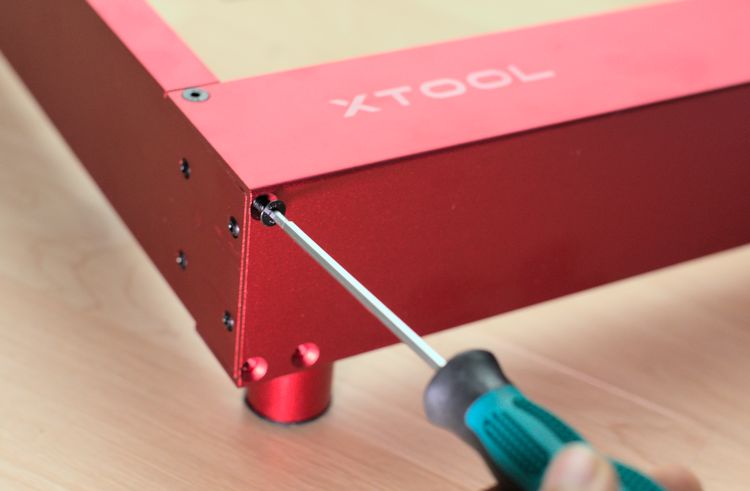
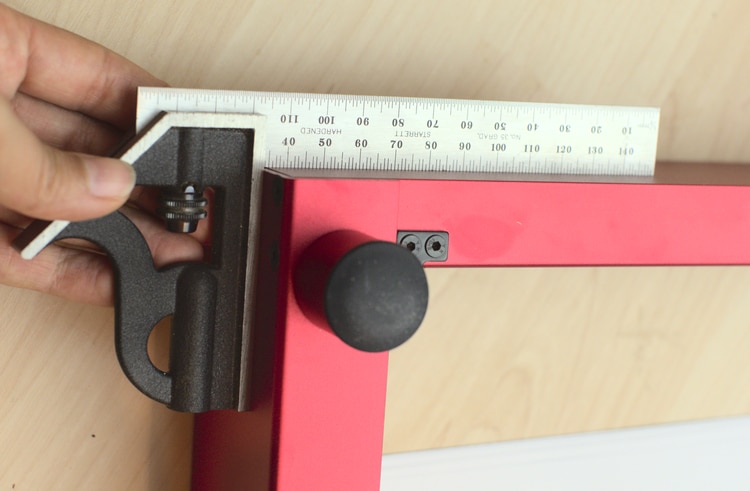
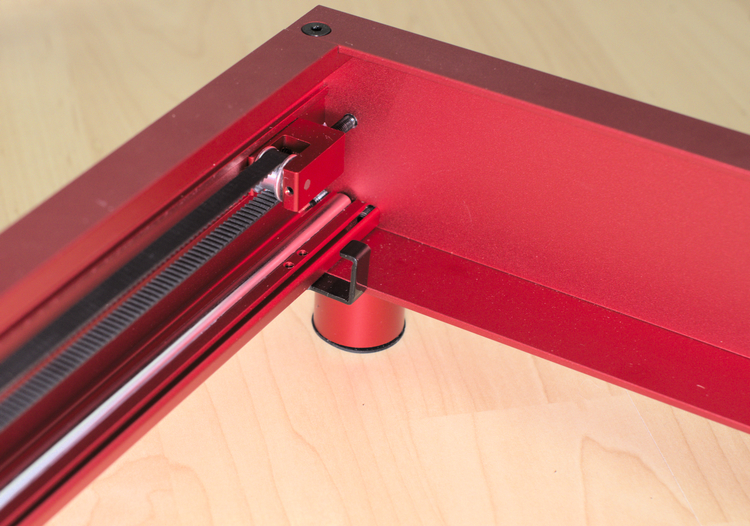
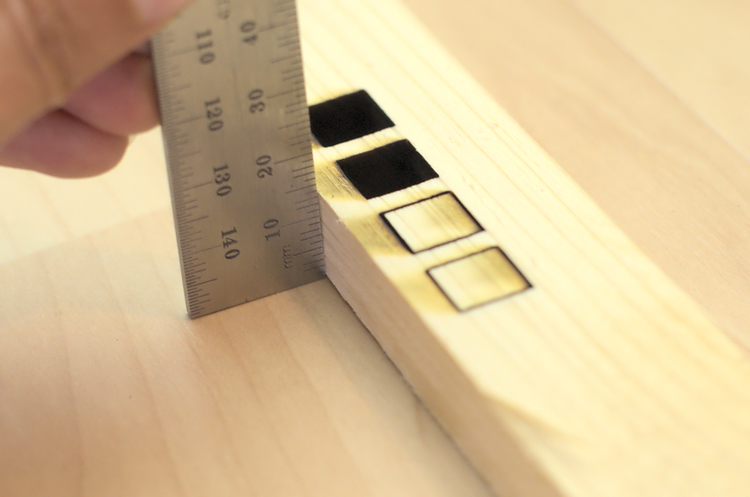
In the first step, the four parts of the frame are screwed together. Each corner of the frame gets four m4x16 flathead screws. I checked the squareness of the frame with my trusted Starret square and found no deviation on any of the corners.
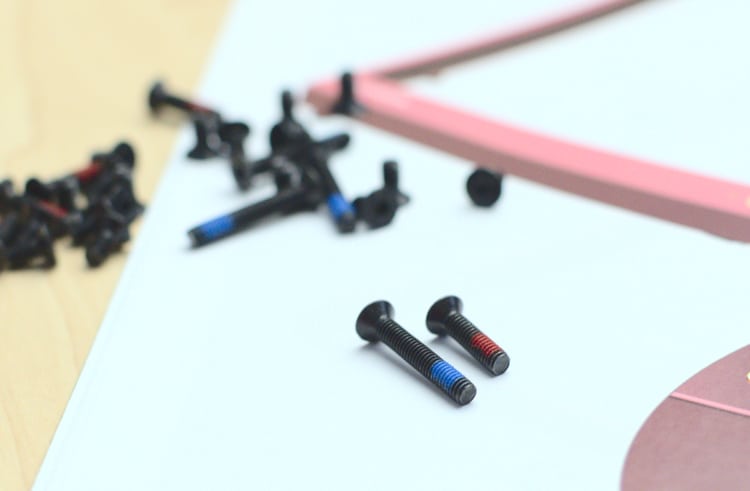
Generally I had the feeling that some thought was put into making the assembly as simple as possible. For example, the different length screws for the belt tensioners and gantry are color coded with red and blue marks.
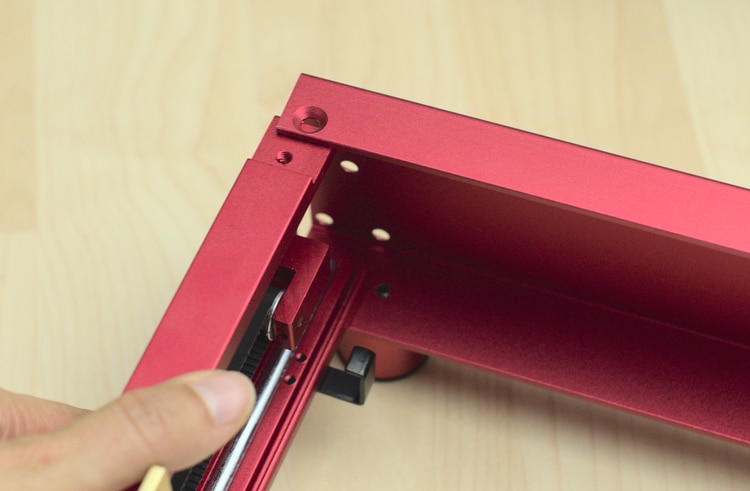
The manual states to slide the two golden y-axis carriages all the way to the front plate to get them aligned but there I had a problem. On one side the PCB board protrudes slightly and therefore makes it impossible to slide the carriage all the way forward. This leads to a gap of approximately 1.5 mm. That’s not much but it would result in the gantry (which will carry the diode module) being skewed. Subsequently, every cut would be out of angle too.
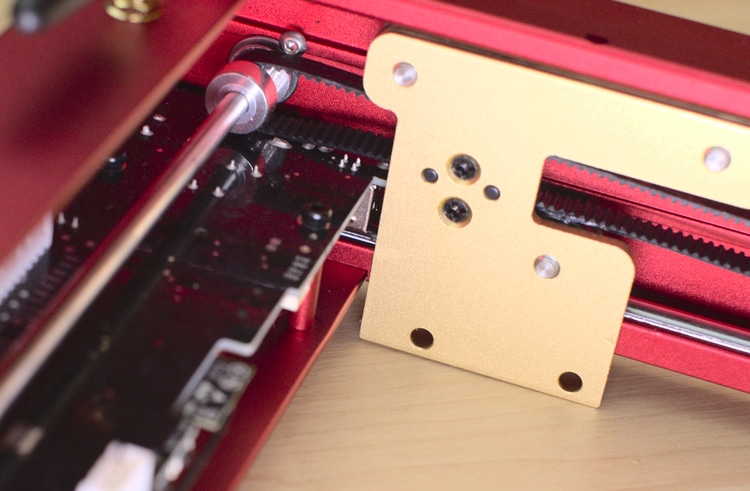
However, there is a simple solution to this problem. Instead of sliding the carriages to the front, just slide them all the way to the back (you might have to loosen or tighten the belt tensioners).
The rest of the assembly went smoothly. I took my time during assembly and I was also making pictures to document my steps. In total, I needed about 1 and a half hours. If you are not taking pictures, I think everything can be done in half an hour.
Software
xTool offers their own software called xTool Creative Studio (XCS) to operate the laser. You can simply download it from their website. There is a Windows and a macOS version. It is also possible to run the D1 Pro using LightBurn, which is probably the most popular and capable software for laser cutters currently available.
After assembly, you need to start XCS at least once to update the firmware to the latest version. Don’t skip this step or else your machine might not function properly!
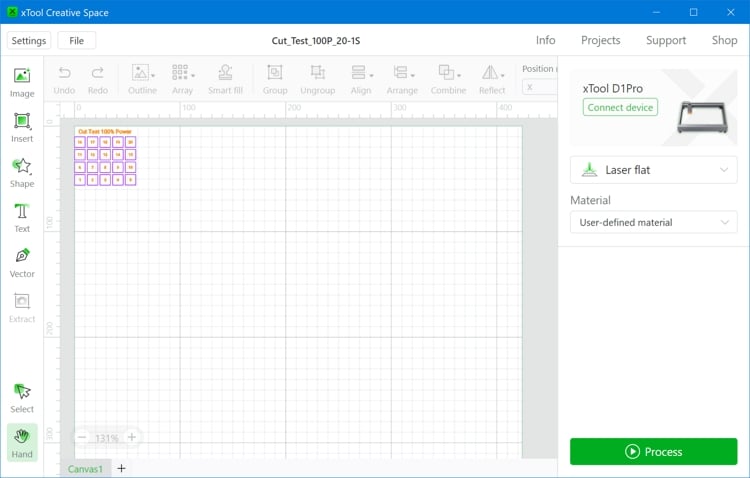
I found XCS to be easy to use. With some previous experience with other vector editing software, it is pretty much self-explanatory. For complete beginners, there are step-by-step tutorials and sample projects available to help you get started.
For all the tests in this review, I only used XCS to run the laser and it worked fine. Yet I would not recommend it to create complex designs (Inkscape or LightBurn will be better choices here). With LightBurn you will also have more in-depth control over your cutting/engraving parameters.
Detailed View on the Parts of the D1 Pro
In this part of the review, I will tell you more details about the main components of the xTool D1 Pro and their functionality.
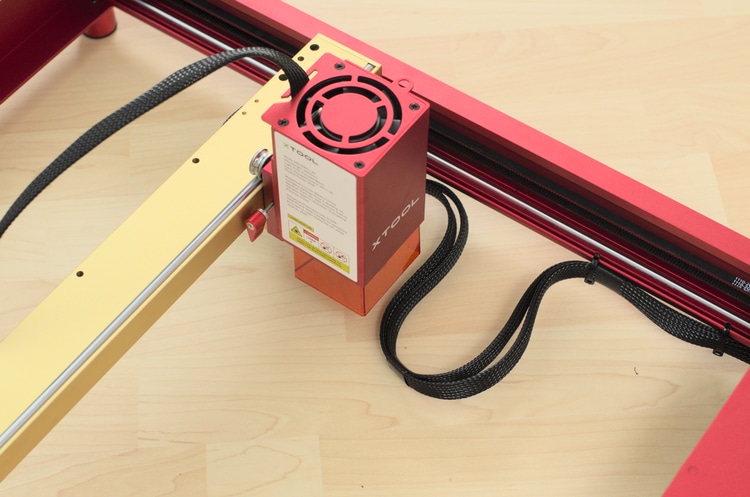
20W diode module
The heart of the D1 Pro is the 20W laser module. Within are four 5W diodes that are combined into one beam. Around the bottom of the module, there is an orange safety shield that protects the user from the laser beam.
Below is a look at the bottom side of the module. The red cone that is mounted around the laser lens comes with an attachment for air assist. It can be removed easily to clean the lens after cutting.
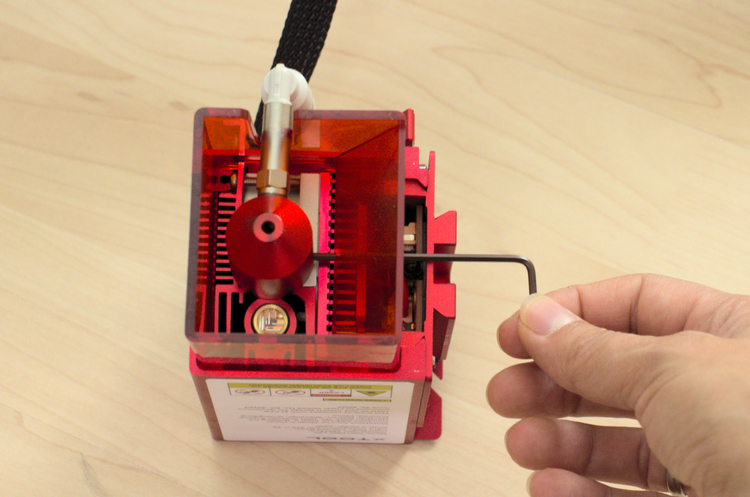
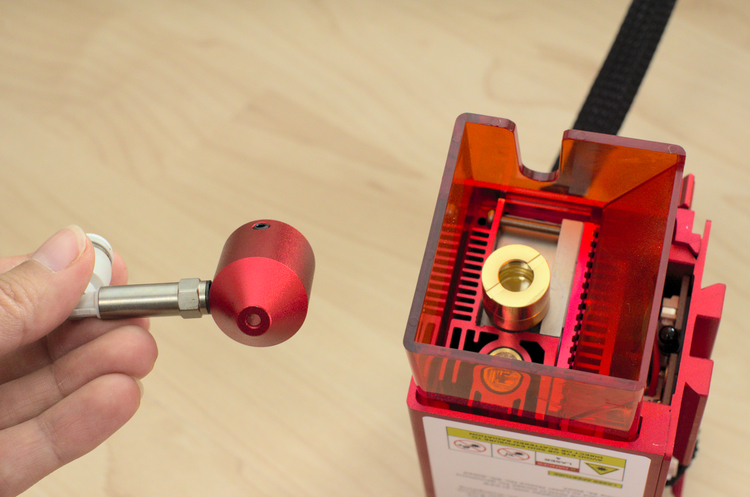
There is also a second diode that projects red crosshairs down on the material to be cut or engraved. You can use it to precisely align the start of the cut/engraving.
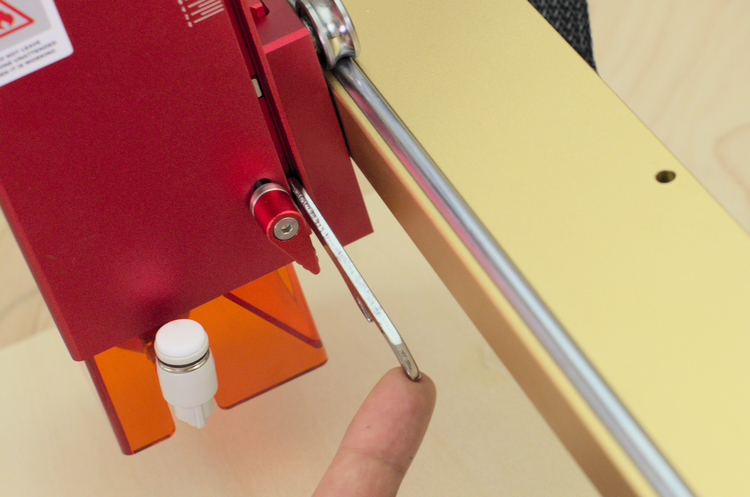
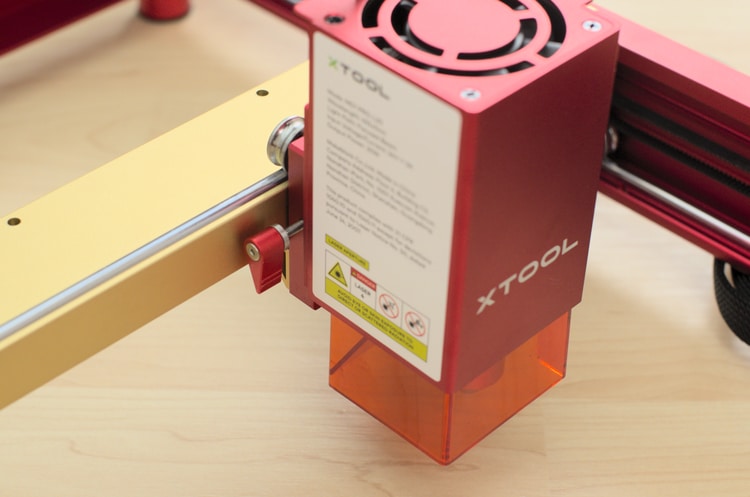
The focus of the laser needs to be set manually at the correct height. The D1 Pro has a nice focus mechanism. On the side of the diode module, there is a silver focus bar. You just swivel the focus bar down and then loosen a screw and lower the module slowly till it touches the material. Once it does, you tighten the screw again and the focus is set.
Axes and Cable management
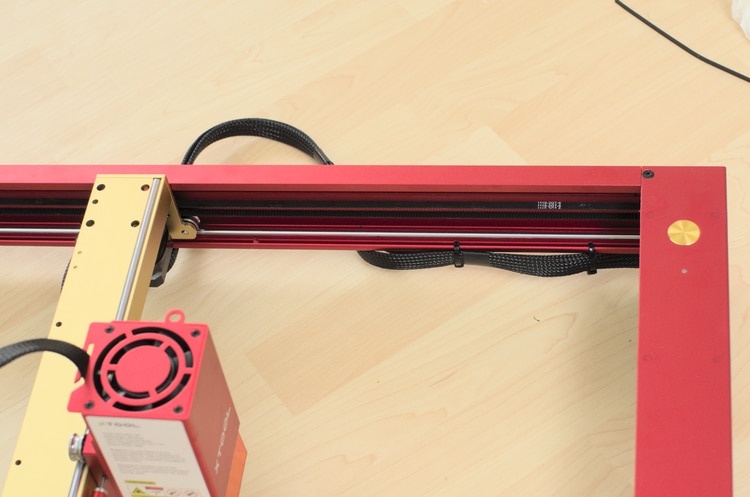
All the axes of the xTool D1 Pro are belt driven and use steel linear rails and rollers to support the gantry. Compared to plastic rollers this minimizes wear and increases precision. The belts are driven by two NEMA17 stepper motors.
There are limit switches on all four sides of the frame. The limit switches allow the machine to detect the boundary of the workable area.
The cables for the X and Y axles are attached to the frame using zip ties. I found that this simple method works okay for the X axle but I don’t find it a good solution for the Y axle. As you can see in the images below there is the possibility that the cable might get into the work area. There it can move the material and mess up alignment. It also can get under the laser module, directly into the cutting path.
Connectivity
You can connect to the machine using either a USB cable or a WIFI connection. The wireless connectivity is a nice little extra as it means that you don’t have to run a cable to your computer or laptop. The image below on the left shows the WIFI antenna.
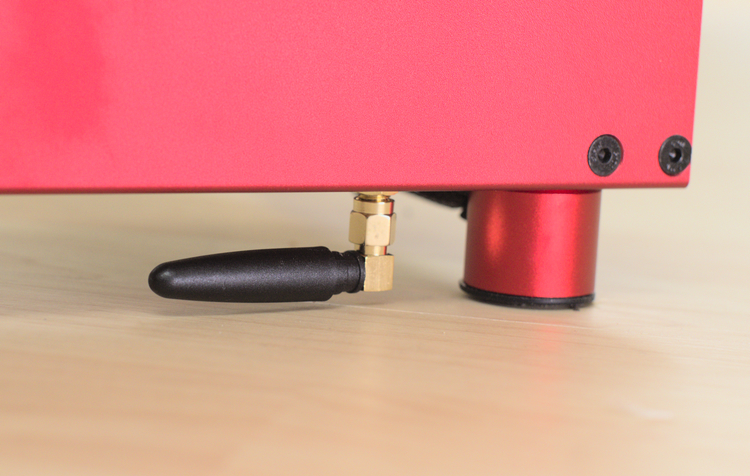
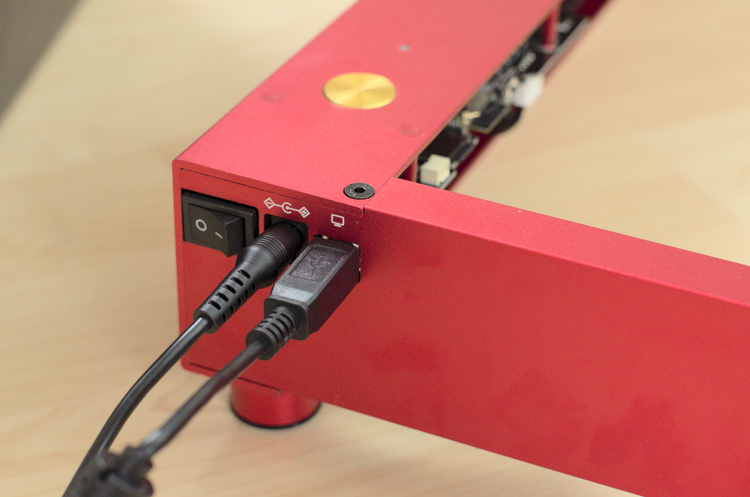
Note: The WIFI connection is currently only supported by xTool Creative Space and not by LightBurn.
Safety Note
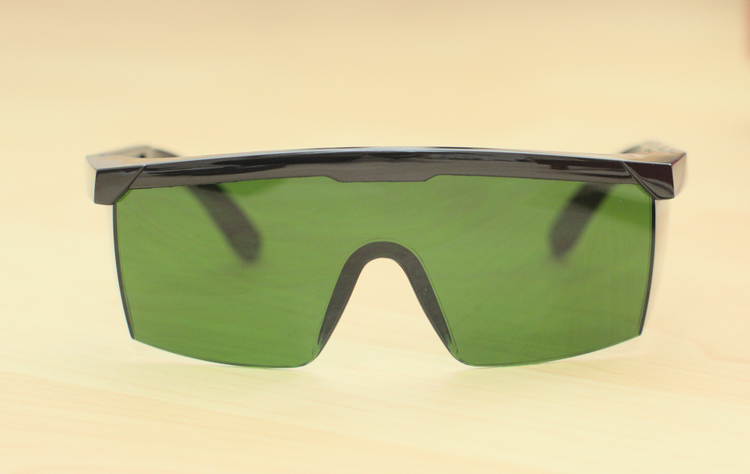
Before we power on the laser, I first want to briefly talk about safety. The D1 Pro is an open-frame laser. There is no full enclosure that protects the user from the laser beam or reflections of the beam. Only use the laser with appropriate safety goggles.

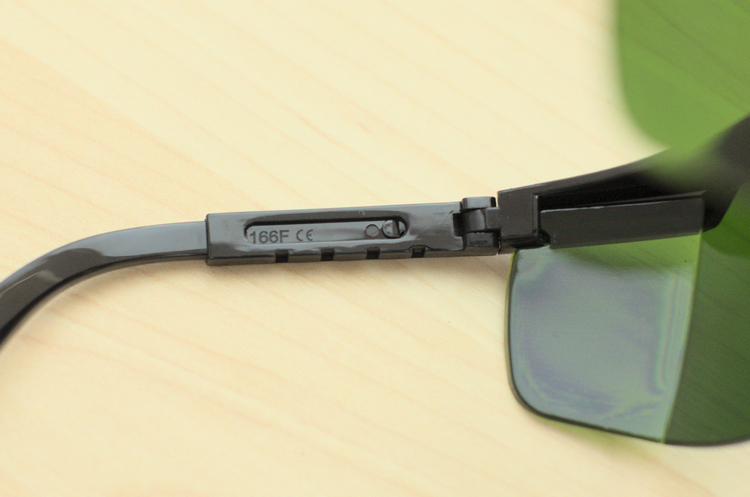
You get a pair of safety goggles with the D1. On the frame, you can find the marking “166F CE”. Unfortunately, this only means that the frame is certified to withstand low-energy impacts. There is no mark on the glasses and therefore no way of knowing how well these will protect your eyes.
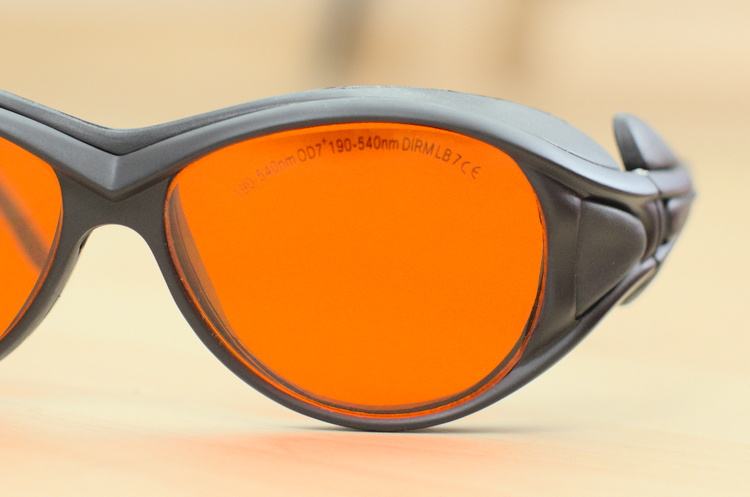
I recommend getting certified laser safety goggles with a rating of OD6 or higher. Make sure that they protect from wavelengths in the range of 455nm (+/- 5nm). Here is an image of the ones I use – note the label on the glass.
In addition, please be aware that cutting or engraving always produces smoke and/or fumes. Breathing in those fumes is not healthy. So only use the laser outside or in a very well-ventilated area or get an enclosure with an exhaust system to vent outside. xTool sells an enclosure and they also offer special laser kits for small businesses which include the enclosure and other useful accessories such as air assist or a honeycomb.
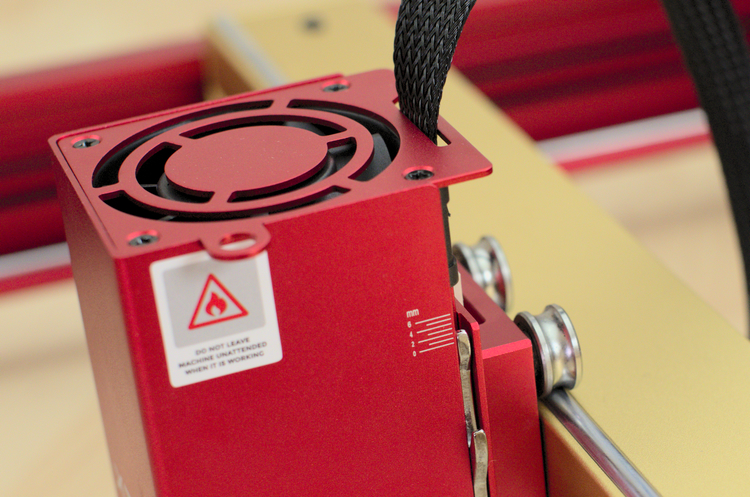
Never leave the laser running unattended and have a fire extinguisher nearby when processing flammable material.
Test Cuts and Engravings
In this part of the review, I will only test the 20W blue laser. There will be a second part for the infrared laser module.
The 455nm blue laser of the xTool D1 Pro is able to cut and/or engrave a wide range of materials such as wood, leather, paper, cardboard, opaque acrylic ( black, brown, red, yellow, green), stone, painted glass, painted ceramics, stainless steel, titanium and aluminum oxide.
Note that it is not possible to cut clear or transparent acrylic because the laser will just pass through the material.
All the tests below are performed using XCS as software and no air assist.
Paper and Cardboard
I started my test series with the materials that require the least power to cut – paper and 1 mm (0.04 in) cardboard.
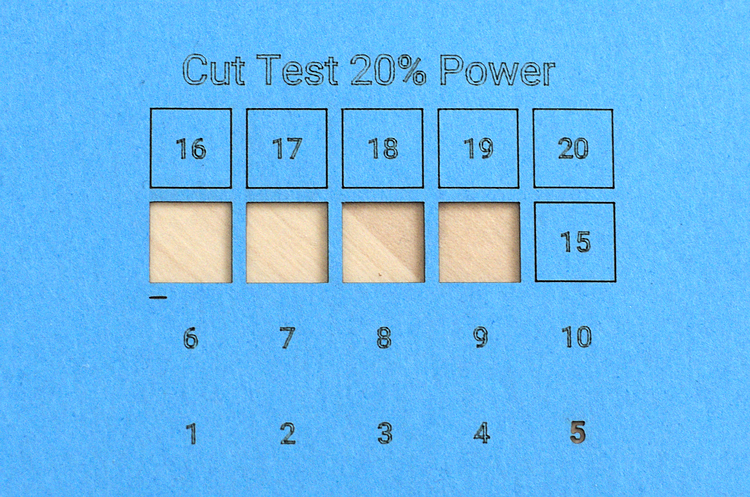
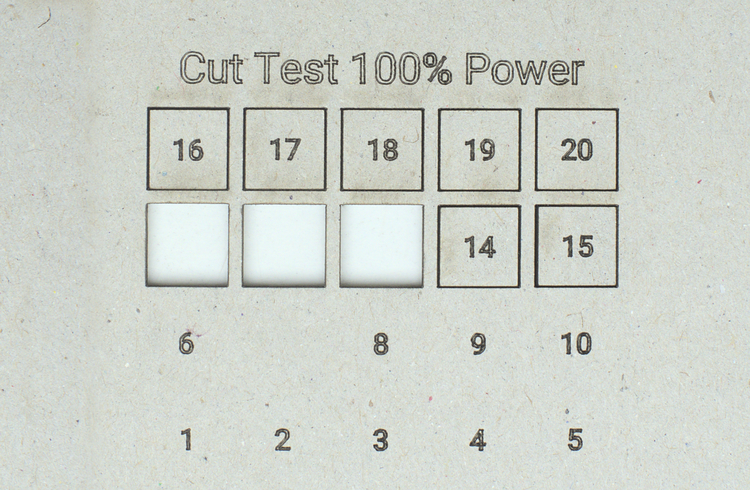
For the paper, I ran the first test using 25% power. At this power level, the paper cut at the fastest cutting speed (20 mm/s). So I ran a second test using only 20% power and there the paper was cut at 16 mm/s.
The cardboard I used is considerably thicker than the paper. At 100% power, it cut at a speed of 13 mm/s. Note that I stopped the cutting test after I had a couple of successful cuts.
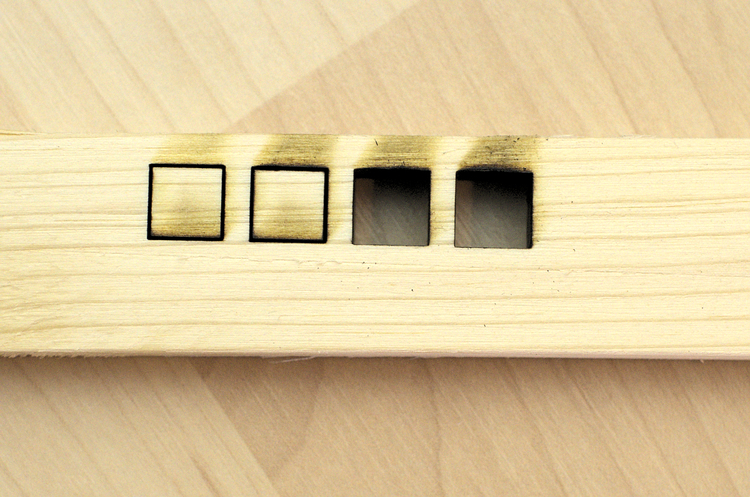
Poplar Plywood
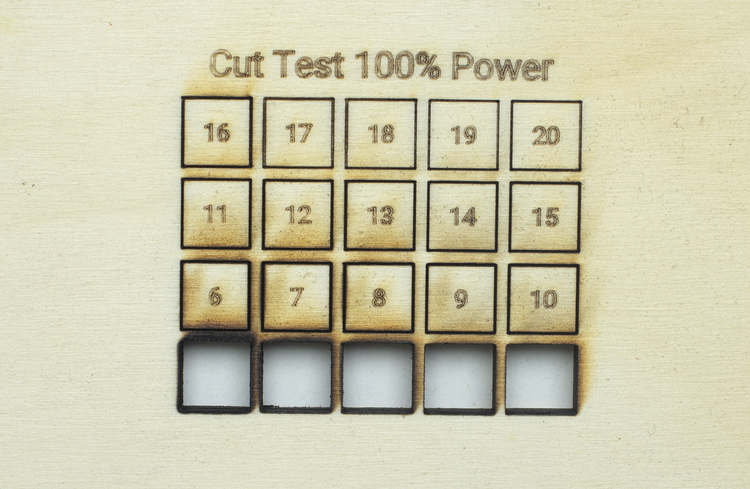
Next,I tested the cutting power of the xTool D1 Pro 20W with 4 mm and 6 mm poplar plywood. For my projects I mainly use wood and so I was really interested in the performance of the D1 Pro.
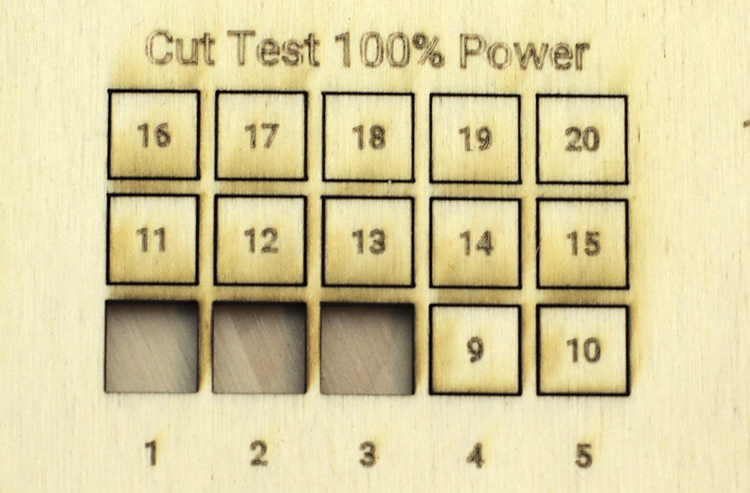

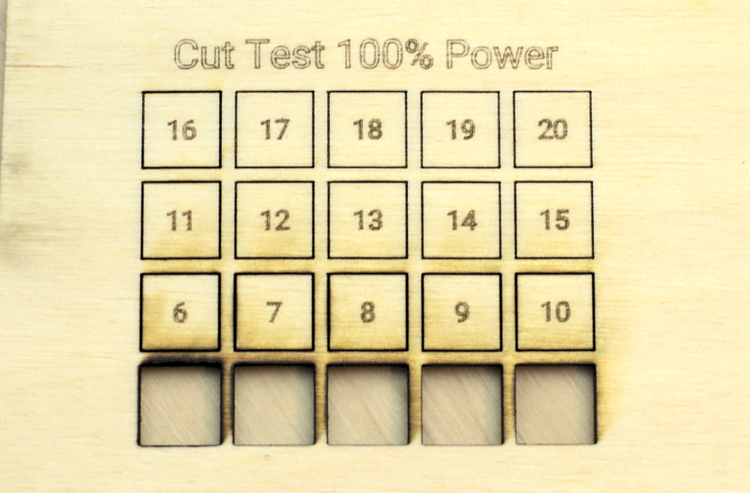
The 4 mm poplar cut completely with a single pass at 100% power and a speed of 8 mm/s and the 6 mm poplar cut at 5 mm/s. This is a great result for a diode laser. Especially when factoring in that I did not use an air assist. An air assist will provide a steady stream of pressurized air aimed directly at the spot the beam is cutting. This helps to get a cleaner cut and would also improve the cutting performance.
Birch Plywood
I did the same test as before with 4 mm birch plywood. Birch has a higher density than poplar and as expected, therefore, needed a slightly slower speed of 5 mm/s to cut.
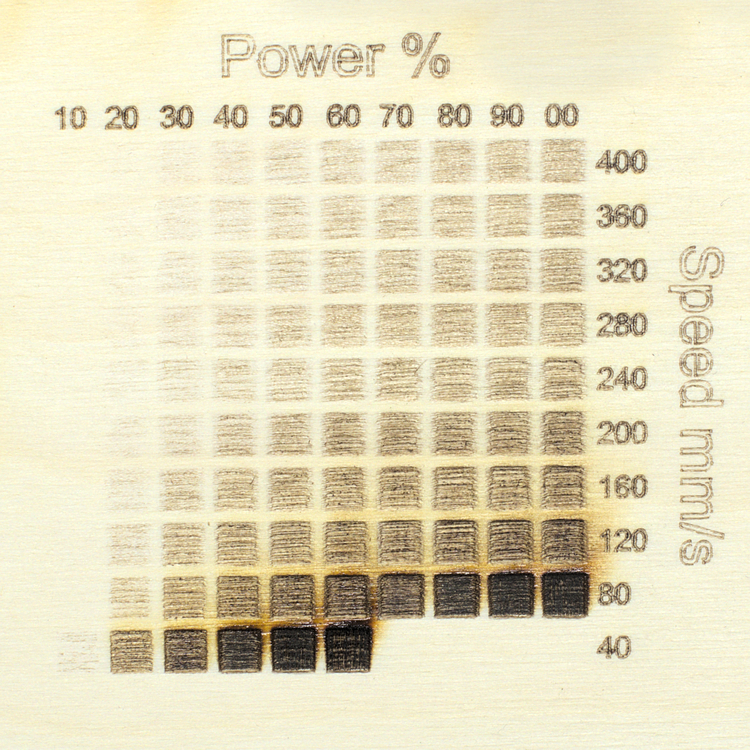
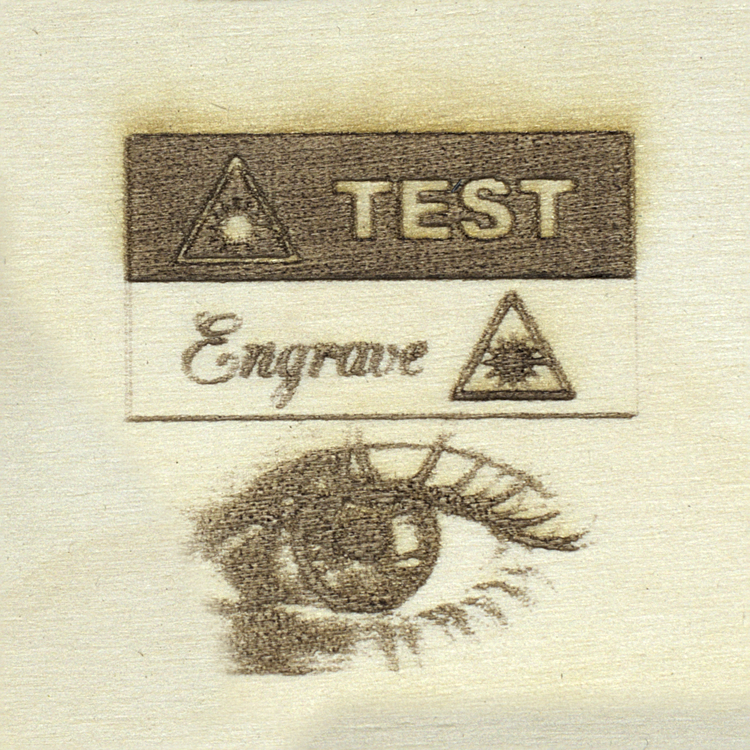
The engraving test on the birch plywood also turned out well.
Black Acrylic
My test piece of 3 mm black acrylic cut at a single pass of 7 mm/s. The edge of the cut piece has a nice smooth finish.
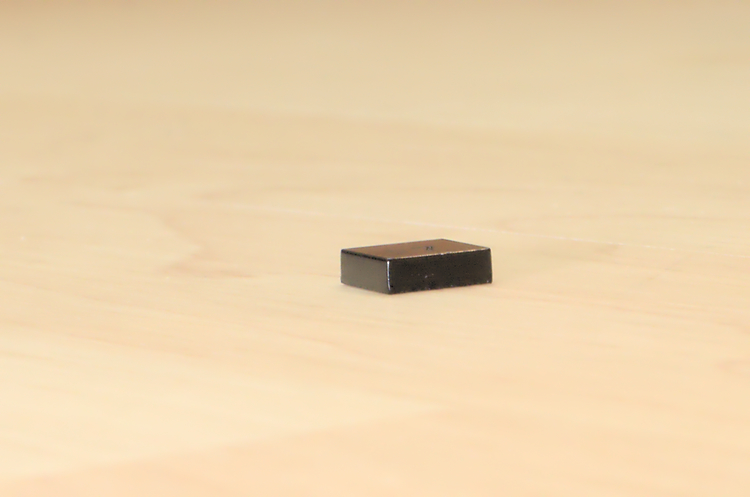
(In case you are wondering why the rectangle cut with 1 mm/s is still there – well I did not remove it directly after cutting and due to the slow speed the material had partly melted and when it cooled down it stuck to the bottom edge.)
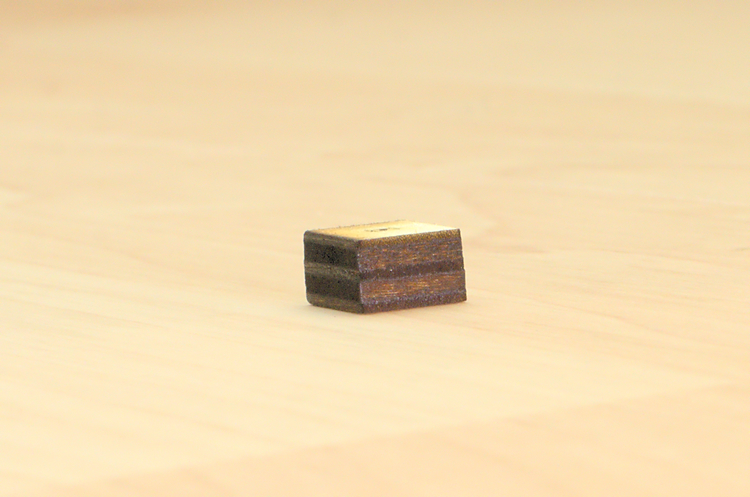
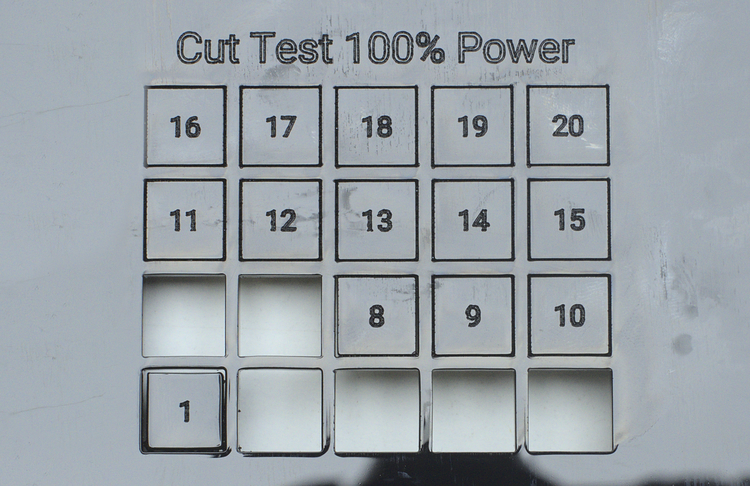
Pine
Finally, I wanted to see how far I could push the 20W module with a piece of 13 mm ( 1/2 in) solid pine. In the previous test, I had quite some scoring when cutting slower than 4 mm/s. (The scoring might be reduced using an air assist, but for this test, I did not use one). So I decided to cut with 4 mm/s and use multiple passes.
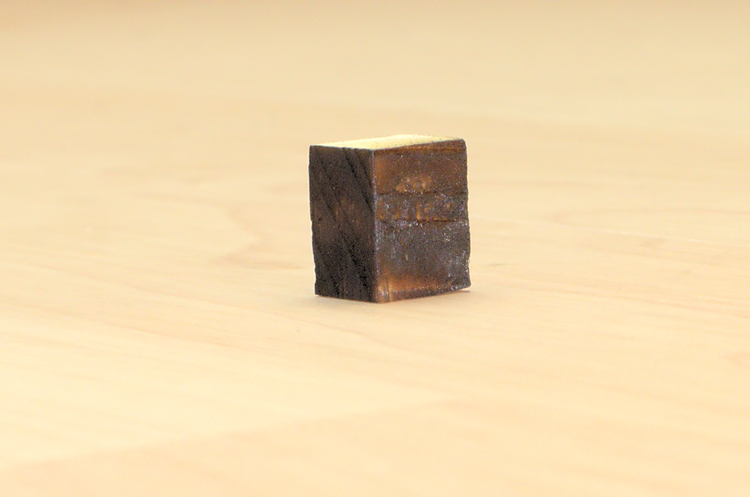
The results were pretty impressive. After the second pass, part of the rectangle was already cut through and after the third pass, the whole rectangle was completely cut.
Read the review of the infrared module here
I will keep using the xTool D1 Pro and continue to write more posts about my long-term experiences and learnings.
If you don’t want to miss it subscribe to the newsletter!
Hi there! Can you tell me what those pair of safety glasses are that you use, and where you got them from? It’s so though to find a reputable seller for safety laser glasses for the X1 Pro 20W
Here is a link to the ones I use: https://www.amazon.de/gp/product/B0895C6GS6/ref=ppx_yo_dt_b_asin_title_o03_s00?ie=UTF8&psc=1
Hey there! thanks for the review! I am happy to see that it can do paper without burning edges. Do you know if it could also cut felt and fabric? Debating between the D1pro 2 in one kit or if I am better off getting the M1. Not sure which is the most versatile and powerful one.
It is possible to cut felt and fabric with the D1pro. Especially natural fabrics like cotton, wool felt also cuts well but smells badly like burnt hair (the smell goes away but it takes some time). I think the biggest plus of the D1pro is the larger work area, the big advantage of the M1 is that it already comes with an enclosure and air extraction.
Hi, are these a legit company, as I notice the main company based in Hong Kong
The parent company Makeblock is a Chinese company but they have been in the market for several years.