
In my previous post, I showed you my favorite Connected Fonts for laser cutting and mentioned that unfortunately there are only a few fonts where really all letters connect to each other. In this post, I will explain how you can add missing connections and turn your text into one completely connected shape. The software I am using is Inkscape, a free and open-source vector graphics editor.
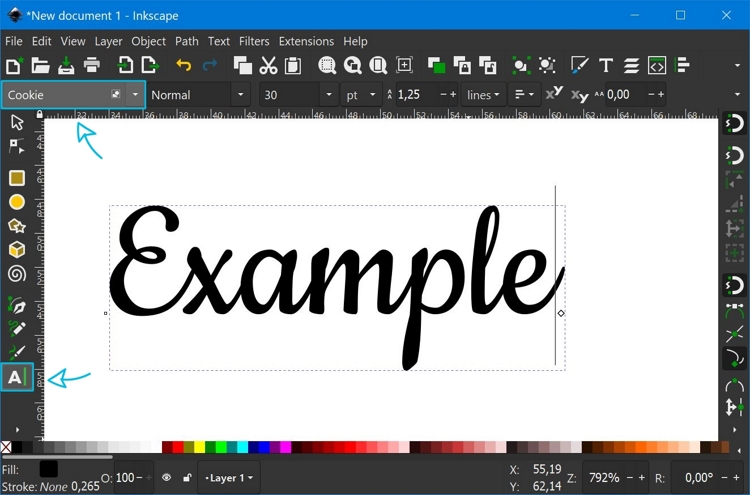
Step 1: Create Some Text
First, we need some text to work with. To create the text, select the Text Tool (keyboard shortcut: T), click somewhere on the canvas, and type your text.
You can use the drop-down list on the top left to select your desired font.
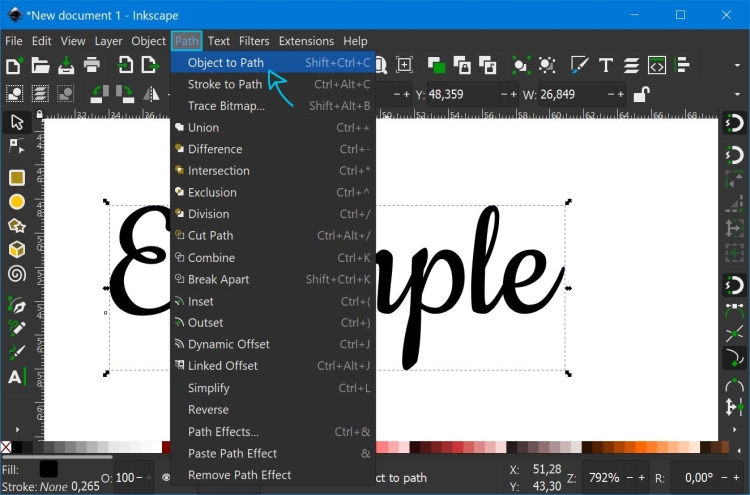
Step 2: Convert Text to Path
Next, we need to turn the text into a path object. To do this make sure your text is selected. Your text is selected when there’s a dotted bounding box around it. (If your text is not selected, simply hover over it with your mouse and then left-click once.)
In the top menu click on Path and then select Object to Path (keyboard shortcut: Shift+Ctrl+C).
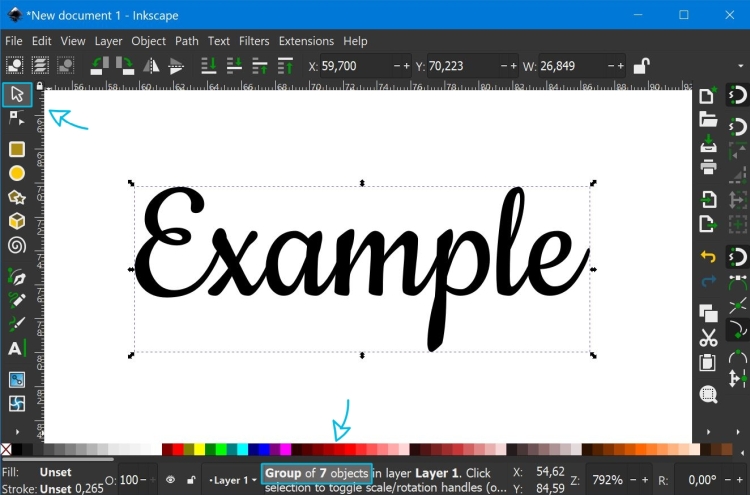
At first, it might seem that nothing has changed, but when you look closely, you will notice two things: First you cannot select or edit the text with the Text Tool anymore. We need to switch to the Select Tool (keyboard shortcut: S).
After selecting, have a look at the info box on the bottom. You will see that the text turned into a group of objects. The number of objects depends on the length of your text because each letter turned into an individual object.
Step 3: Ungrouping and Adding a Stroke
The next thing we need to do is to ungroup. For this either right-click on the group and select Ungroup or select the group object with the Select Tool and then click on the Ungroup Symbol (keyboard shortcut: Shift+Ctrl+G)
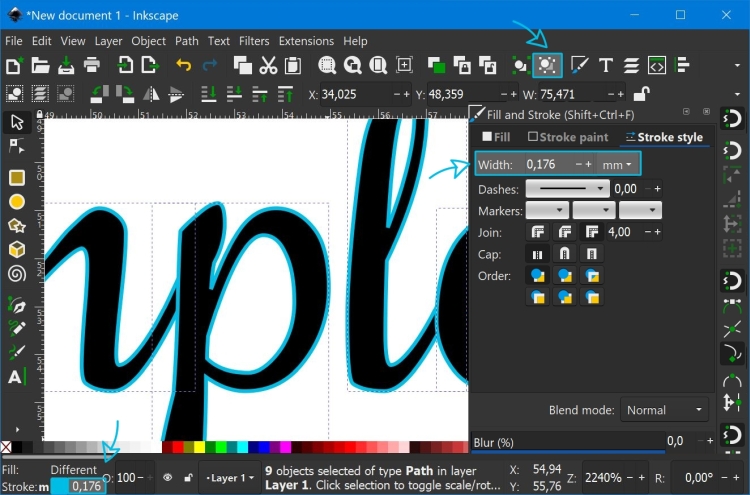
Now we add a stroke. With the letters still selected, hold Shift on your keyboard and click on one of the colors in the color palette at the bottom of the screen. This adds an outline in your chosen color around each letter.
You can change the width of the stroke by clicking on the number next to the stroke color on the bottom left of the screen. This will open up the Fill and Stroke menu on the right side. There you can edit the number in the Width field.
With the stroke added, you can now clearly see that each letter is an individual object.
In the image above I also zoomed into an area where some manual editing is necessary to make the text completely connected because the “p” does not connect to the “l”. You can zoom in Inkscape by pressing + (zoom in) or – (zoom out).
Step 4: Add missing connections
To add the missing connection, we will draw a short line. Grab the Bezier (Pen) Tool (keyboard shortcut: B). Click somewhere in the “p” to set the first anchor point, then click into the “l” to set the second anchor point. Right-click to finish the line.
TIPP: When you hold down the left mouse button and then drag your mouse while setting the second anchor point, you can create a curved line.
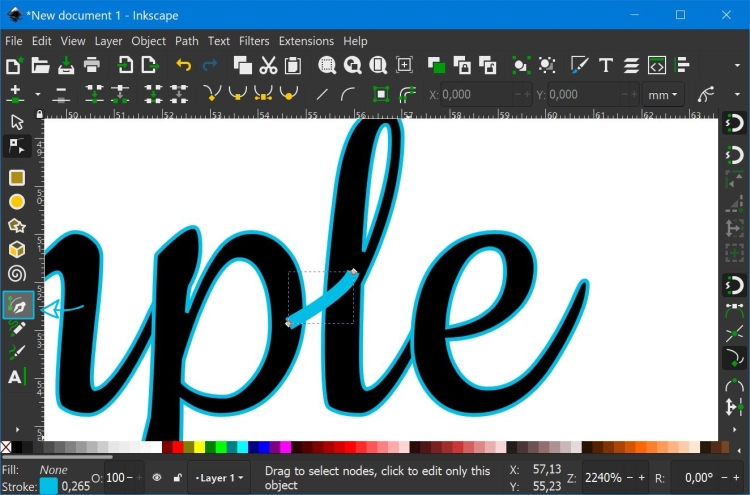
You can edit the anchor points with the Nodes Tool (keyboard shortcut: N). To change the position of a point simply click it and drag it around. You can also click and drag the line itself to change its shape.
With the line selected, set the stroke width to a value that fits with the rest of the font.

Step 5: Stroke to Path
Before the final step, we need to turn the stroke of our line into a path. This is done by selecting the line and then going to Path > Stroke to Path (keyboard shortcut: Ctrl+Alt+C)
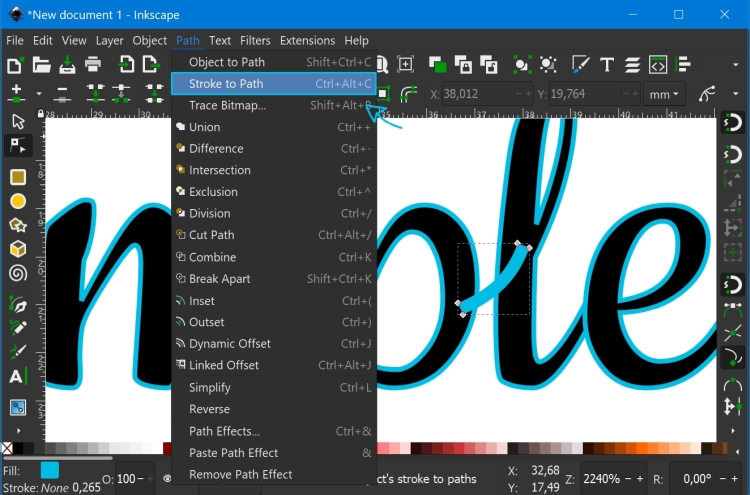
After the transformation the line is a filled shape.
Step 6: Merging everything together
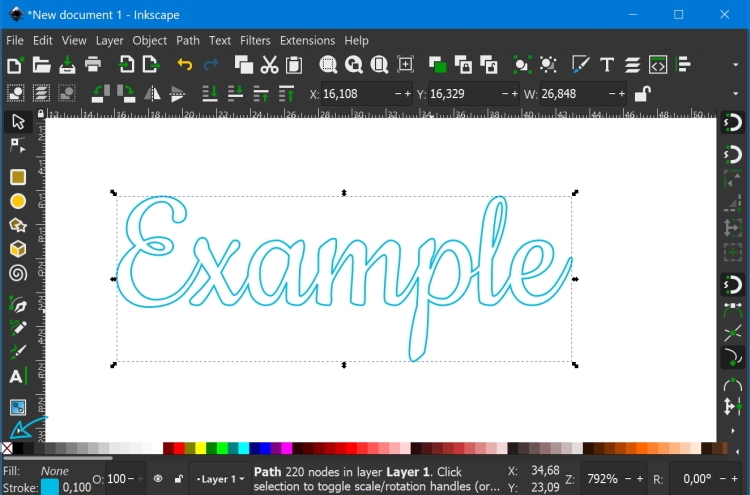
For the final step, first select everything by either using the keyboard shortcut Ctrl+A or by using the Select Tool and dragging a rectangle around all objects.
Then in the top menu select Path > Union (keyboard shortcut Ctrl+ +). This turns your text into one connected shape. You can remove the fill color by clicking the white field with the red x in the color pallet.
Your text is now ready for laser cutting.
I hope your found this “Inkscape for Laser Cutting” tutorial useful. Let me know in the comments in case there are any questions.
Liked this Post?
Sign-up for the newsletter and stay updated on similar content!
I am laser cutting names at the moment and have found this set of instructions very useful. There is one problem that I am having though and I can not seem to find a fix on the internet. The problem is with floating dots above lowercase ‘i’. I have seen sign examples where the dot sits nicely on top of the ‘i’ upper stroke. This is not inherent in the font. Is there a way of isolating the dot and reposition it on top of the stem in Inkscape?
After you ungroup the letters in step 3 switch to the “Edit paths by nodes” tool (keyboard shortcut:N). Click on the “i” and then drag a selection just over dot of the “i”. Now you can use the arrow keys to move the dot or you can click on one of the selected nodes and drag the dot with the mouse.
Hope this helps!
Hello when I try joining my letters together by path- union, the letters don’t change. Could this be to do with the font I am using? I have followed all of the steps.
Hello when I try joining my letters together as a union it doesn’t change them and they are still all separate letters with each letter stroke overlapping. Can you help?
After you selected all your letters, check what the text on the bottom of the Inkscape window says. It should be something like “x objects selected of type path”. Make sure there is no group selected because those can’t be joined. If you still have groups, you need to ungroup again.
Hello,
This was really helpful, but which of these steps do I need to follow if I want to laser cut a word made up of separate letters, like this TEXT.
Thanks, Arthur
Do you just want to get the individual letters or do you want to cut out the text from a rectangle (or any other shape)?
I want to use a print font – not script. I want to attach all the letters somehow so it cuts out as one word, making it easier to attach the name to an ornament. Is this possible? How?
The easiest way would be to use a line at the bottom to connect all letters or to reduce the space between letters
 :
: