
When I am working on projects I notice two things regularly. First, it is very hard for me to throw away scrap wood. I tend to keep thinking that there will be some future use even for small bits of material and store them roughly sorted by type and size in different containers. I have to confess I sometimes even “rescue” scraps of material out of the trash bins from the shared makerspace where I use the laser cutter.
Second, while I am in the middle of some glue-up I often wish for an extra pair of hands. I have a collection of bar clamps in different sizes but I often find even the smaller ones to be too big and bulky. I have also used painters tape to hold parts in place but this does not work well for situations where a bit more force is needed.
So with this project, I am going to tackle both issues in one go! I will make small wooden spring clamps out of scraps.
Material:
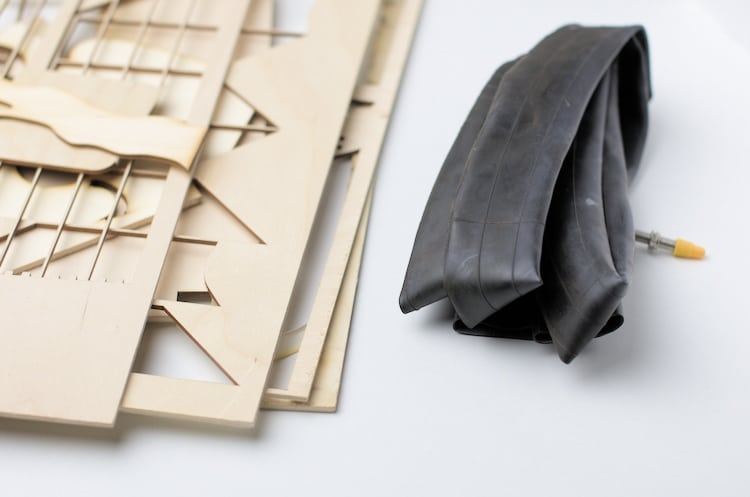
- Wood scraps
- Old bike tube or rubberbands
- Sandpaper
- Wood Glue
Tools:
- Laser Cutter, Scroll Saw or Fret Saw
- Knife or Scissors
Designing the Wooden Spring Clamps
I used this Thingiverse Project as a basis for the clamps but basically re-designed everything from scratch. There were two main reasons for this:
- When I tried to open the DXF file from Thingiverse in Inkscape or Illustrator some of the curves turned into straight line segments and some just looked weird.
- I wanted to make my clamps with rotating jaw pads instead of fixed ones to distribute the grip force over a larger area.
By the way – I was not sure if “Spring Clamp” is actually the right term to describe this style of clamp but as technically a rubber band is a tension spring where energy is stored by stretching the material (I was not sure about this – but I looked it up on Wikipedia…) this should be correct.
Below you can download my final cut files.
Cutting and Assembling
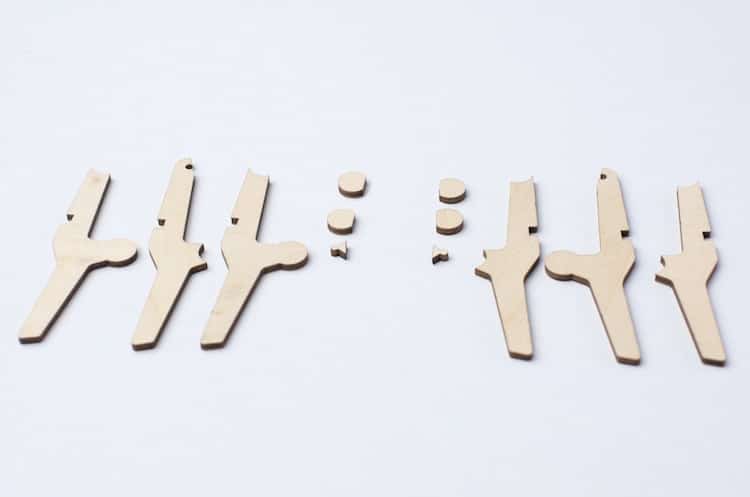
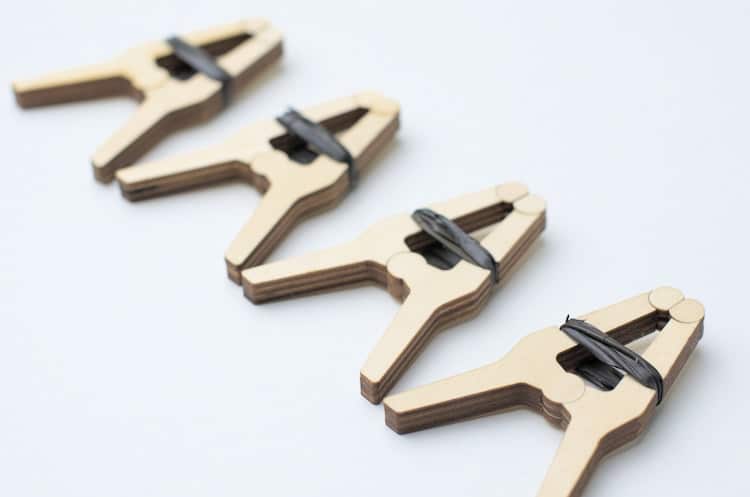
I cut all the parts on a laser cutter at my local maker space. Each clamp is made out of twelve parts: three parts each for the left and right main body of the clamp and three parts each for the jaw pads.
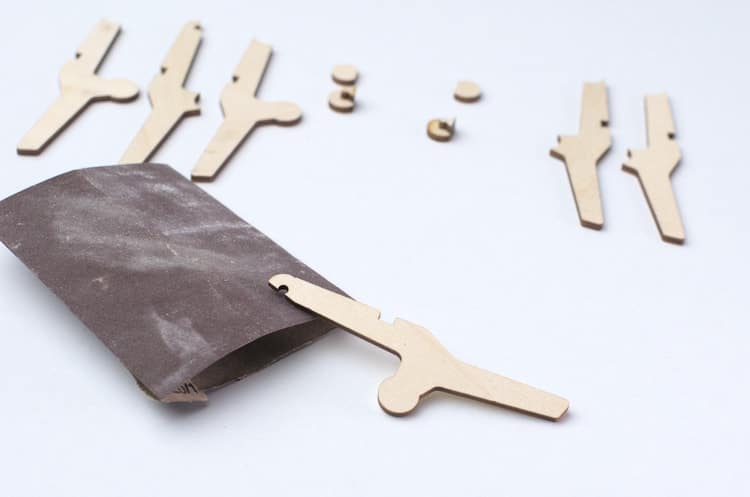
After sorting the parts, the first thing I did was to lightly sand the top of the two middle parts for the main body on both sides. There is not much sanding required. The idea behind this is to just remove a little bit of material so that the jaw pads can rotate freely.
Next, I glued the main body parts together. While the glue was drying I turned to the jaw pads. For each side, I glued the bottom part and the middle part together. As the middle jaw part is quite small it is a bit fiddly to align it correctly with the bottom part.
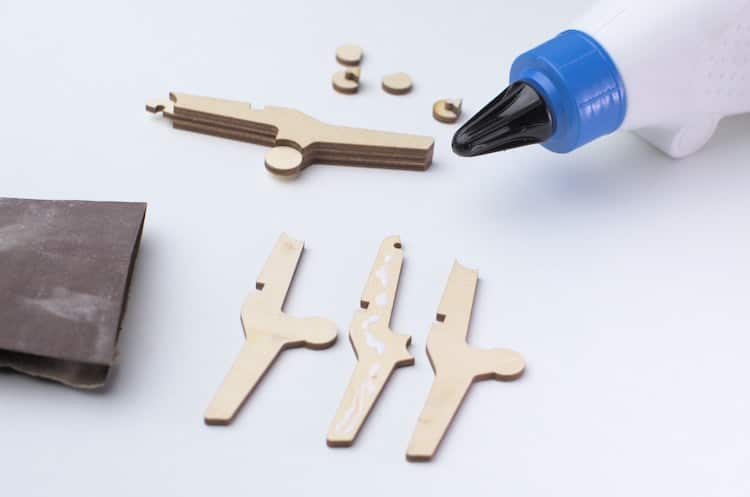
With this done, the jaw pad part can now be joined with the clamp base. I found that it makes a difference from which side you insert the jaw pad. So try both and use the one that rotates easier.
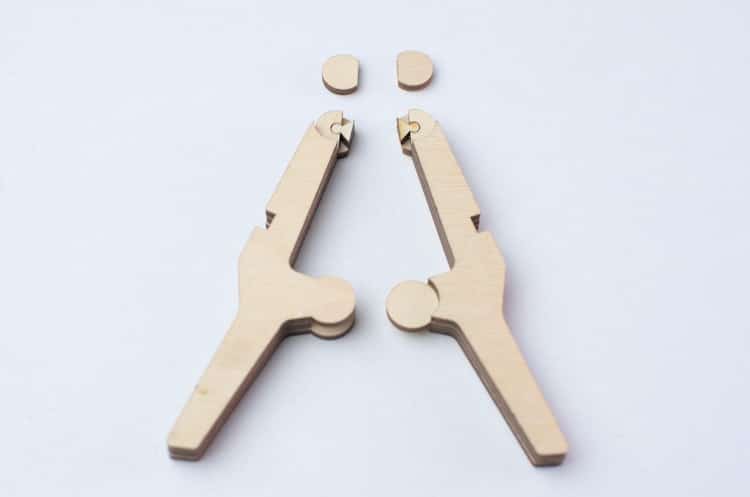
When gluing the final piece of the jaw pad, be extra careful to avoid excessive glue and make sure that the jaw pad can turn freely in both directions.
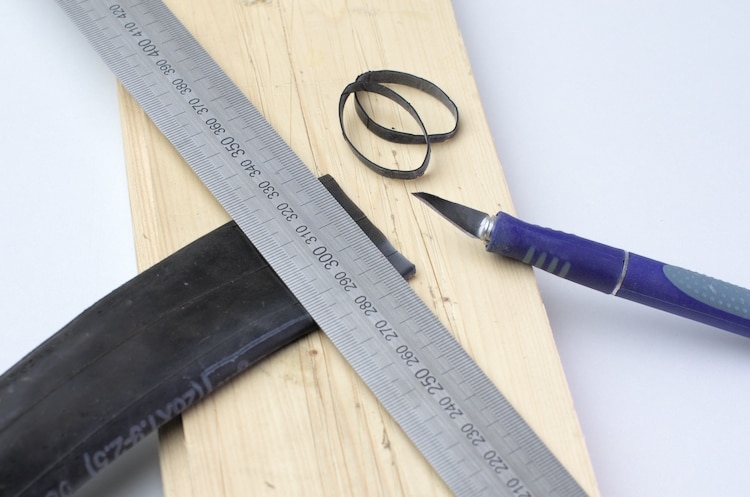
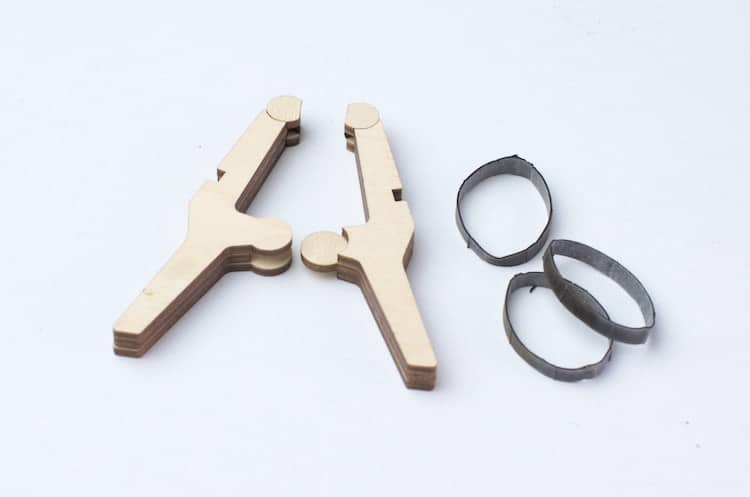
Now that both clamp halves are ready, the only thing left to do is to join the two and add the rubber bands. For the rubber bands, I used an old inner tube from a bike tire which I cut in strips about 3 mm ( 1/8 in) wide.
The resulting rubber bands are pretty strong and more durable than regular rubber bands in my experience. In addition, it’s a nice way to upcycle the tube instead of just throwing it into the trash bin. You can control the clamping power by the number of rubber bands used.
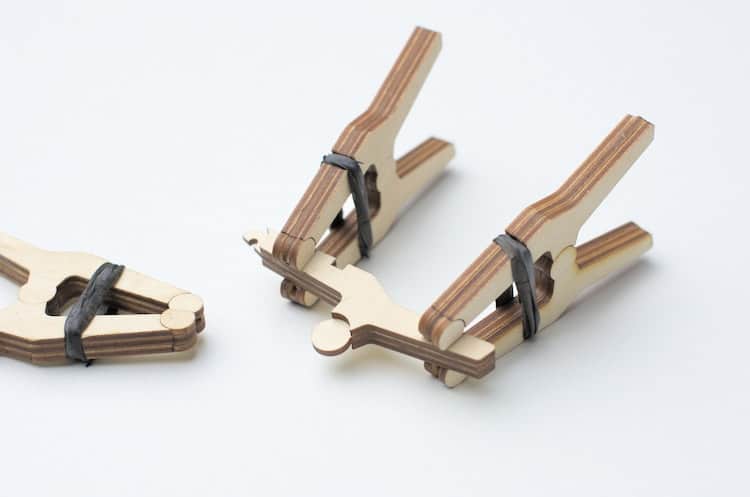
Using Clamps to Make Even More Clamps
Once the first clamp is assembled it can be used to make even more wooden clamps!
Testing and Further Ideas
The clamps work great for light-duty clamping and for small parts. I now use them regularly when gluing multiple layers together.
I am not 100 percent happy with the rotating jaw pads. They work okay but the tolerances are quite tight and they sometimes can get a bit stuck. I might redesign them for a future version. If anyone has ideas for a design improvement please let me know in the comments!
Great article, top design. I don’t have laser facilities so I’m going to have a play with my CNC and a fine straight cut bit.
Thanks! I don’t have much experience with CNC but you might have to adjust the jaw pads as they are probably to small to cut even with a fine bit…
Das ist eine Vorlage für einen Laser. Legen Sie ein 3mm dickes Sperrholz in das Gerät und die fertige Vorlage schneidet der Laser problemlos aus.
bonjour bill
alors avez vous essayer avec la cnc ?le resultat est il aussi bon qu’au lazer ?
merci d’avance
david
Really cool redesign. Thanks a lot for sharing. Sadly the download link doesn’t seem to work for me…
Thanks for letting me I know! I just checked and there was an error with the SVG file. Please try the download again, it should work now.
The PDF seems to be corrupted.
Unable to view.
Thank you for your confirmation.
Yes there was a problem – thanks for letting me know! It should work now.
MUCHAS GRACIAS, QUEDARON INCREÍBLES…
Very helpful
love it, we were looking at things to do with our scrap, so much scrap! guess whos going to be cutting clamps today.
Great to hear that!
Thanks for sharing!
🙂
This is great! Thanks!
Happy you like it! 🙂
I like the clamps. I’m going to increase the size of them and see what happens. Thanks, neat project.
Thanks! Would be intresting to know how the bigger clamps work.
I love these clamps! The first set is currently glued and drying. Thank you for this website as each project is unique and you have a good range of projects for various levels of skills. I hope you’re still coming up with new projects as I will be visiting this page regularly! I’d also be willing to donate some $$ to show my appreciation.
I am fairly new to laser cutting etc. but I have been looking for these clamps. I am like you and hate to throw anything away so this is a great idea.
you can never have enough clamps.
Thank you
Great design
I love this design! My first one I made the jaws kept coming off – the ply would de-laminate because the surface area of the joint was so small. I changed the jaw design using a bamboo skewer axle and made a half dozen of them. I also sized it up and made a few larger ones. I realize I could have bought some plastic ones at Harbor Freight for a few bucks, but where’s the fun in that? This was a great project – thanks for the design!
I like the skewer part – do you have a link to an SVG possibly, please … and thank you!
Thanks for the SVG download and the instructions that are very clear. I made two of these with my xTool M1 Ultra using the 20W laser module. With the first one I had to sand down the diameter of the jaw pads a little to make them nest in the reassessed areas to get them to rotate without jamming up. With the second one I ended up opening the SVG file in Affinity Designer and increased the diameter ever so slightly of the reassessed areas that the jaw pads nest in to allow for a smoother rotation. They work beautifully.
This is such a great design by the looks of things – busy cutting my test now 🙏👍