
This Halloween project is made from laser-cut wood and painted with acrylic paints. If you want to keep things simple just use the template to cut the parts and glue them together or let your creativity run wild and turn this into your own custom monster chest!
Material:
- Plywood
- Sandpaper
- Wood Glue
- Paint or Stain
Tools:
- Laser Cutter
- Brushes
- Sponge
- Files
Laser Cutting Template – Halloween Monster Chest
I started with some sketches. I wanted my monster chest to be somewhat friendly but also not too cartoony looking. After I came up with a design I liked, I modeled all the parts in Fusion 360 and then exported them into an SVG file for cutting.
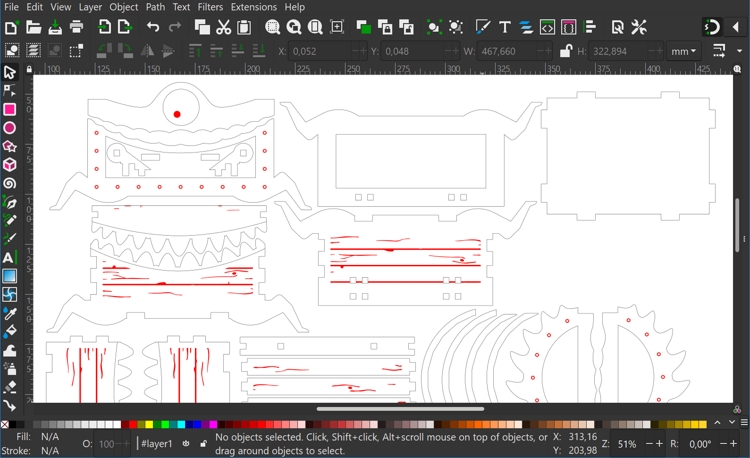
You can download the cut file below. This template is designed for 3 mm material, but you can easily rescale it for a different material thickness.
Assembly of the Inner Layer
I laser-cut all the parts for the chest from a sheet of birch plywood. I will be painting the chest with acrylic paint. My plan is to go for a classic old treasure chest look made from wood with metal bands. Below I will my technique (but feel free to make your own custom monster box for Halloween).
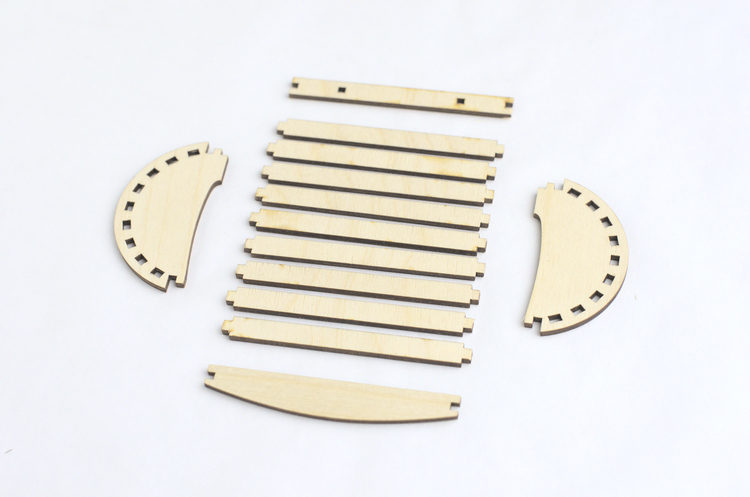
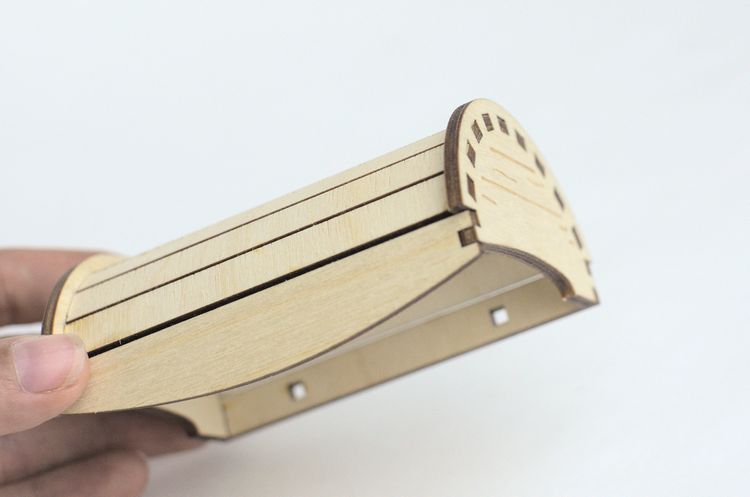
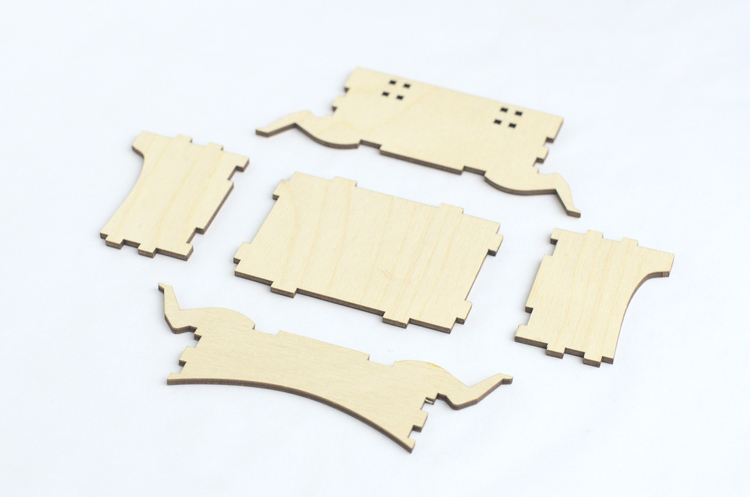
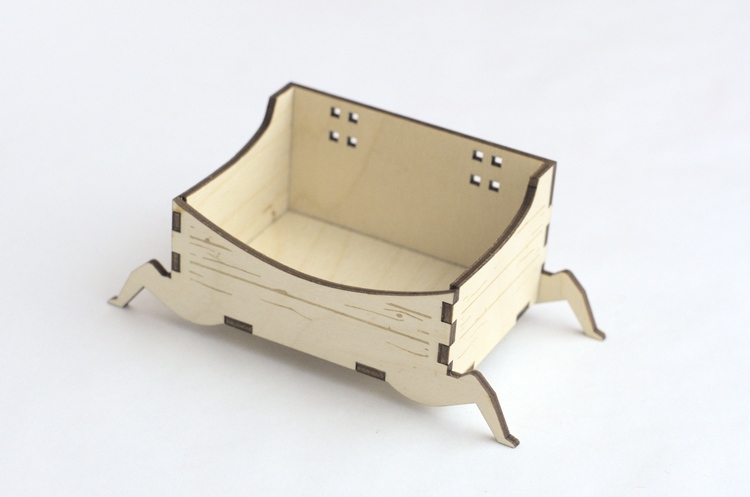
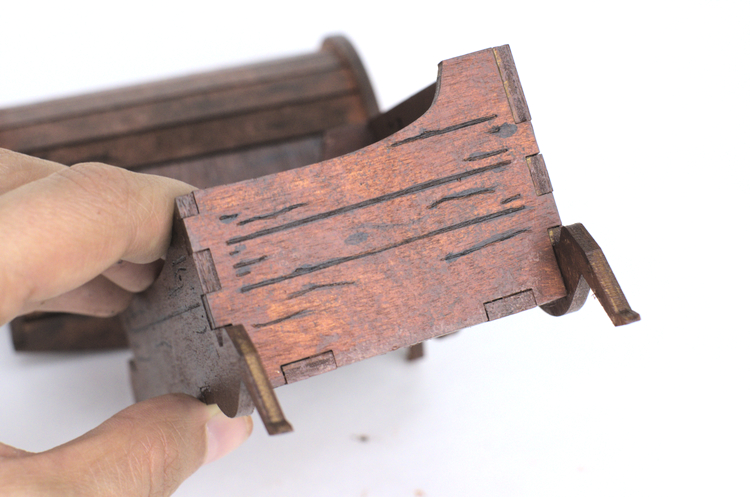
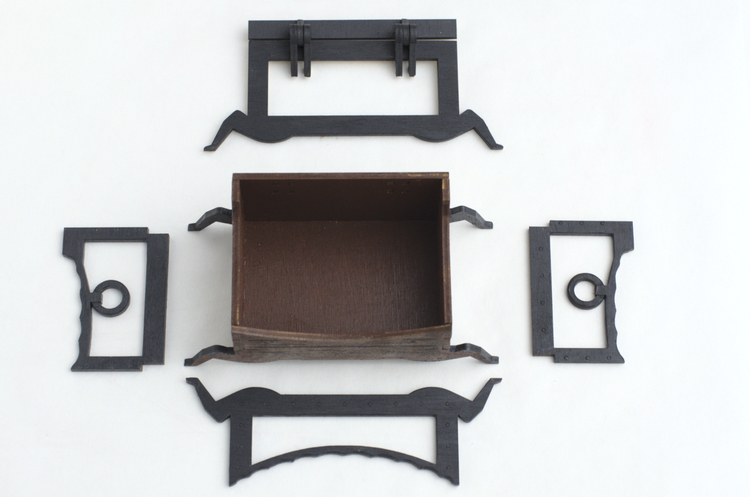
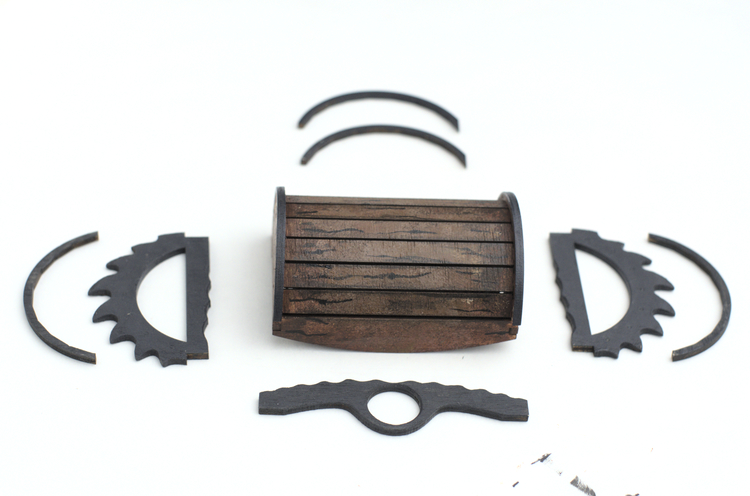
The first step is to assemble all the parts of the inner layer. Start with the top part of the chest. It is made up of two side parts, 9 parts that form the arch of the chest lid, and a front and back plate.
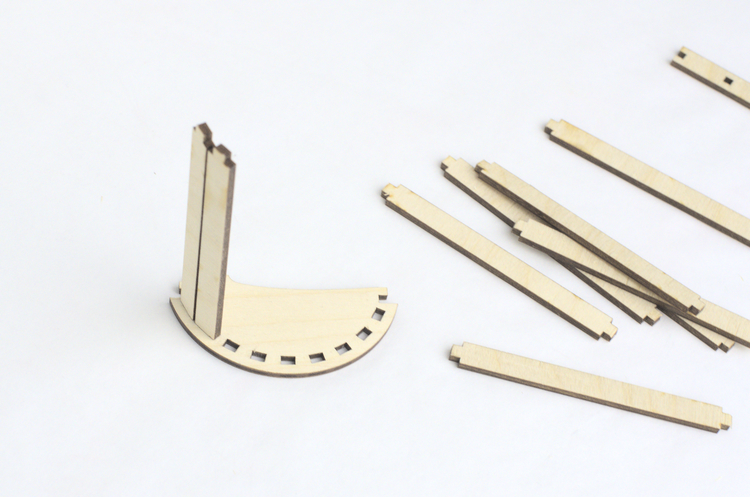
Important: Make sure that the rounded front plate connects with the sides as shown in the image above. The back plate with the two rectangular cutouts should meet with the flat part of the sides.
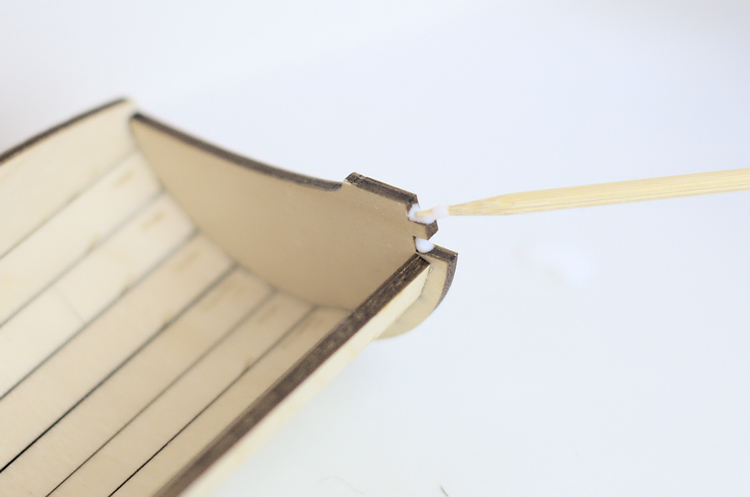
All parts are glued using wood glue. I like to use a skewer to precisely apply the glue in tight spots.
Afterward, make the lower part of the chest. It consists of five parts: bottom, left side, right side, front and back.
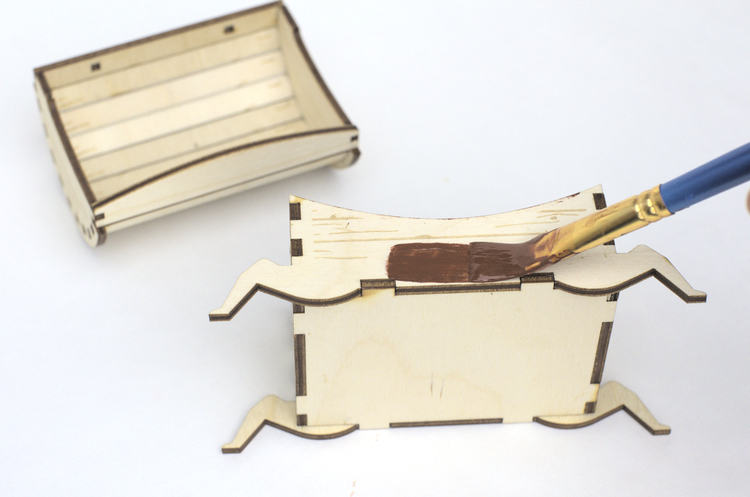
Painting and Texturing the Inner Layer
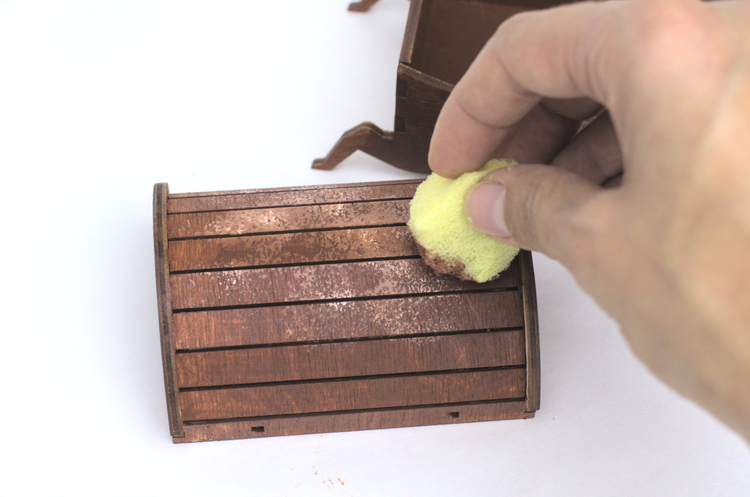
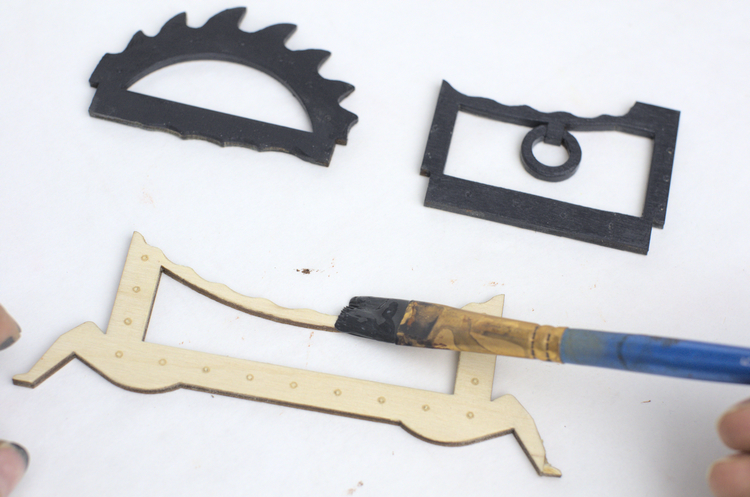
For painting, I worked with regular acrylic paints. I started with a mid-brown base coat and completely covered the inside and outside of both chest parts.
After the paint dried I added some texture. I used a regular kitchen sponge that I roughly cut to a rounded shape using a scissor. First, I mixed a lighter brown and applied it with the sponge. Once this coat was also dry I did the same again but this time I used a dark brown.
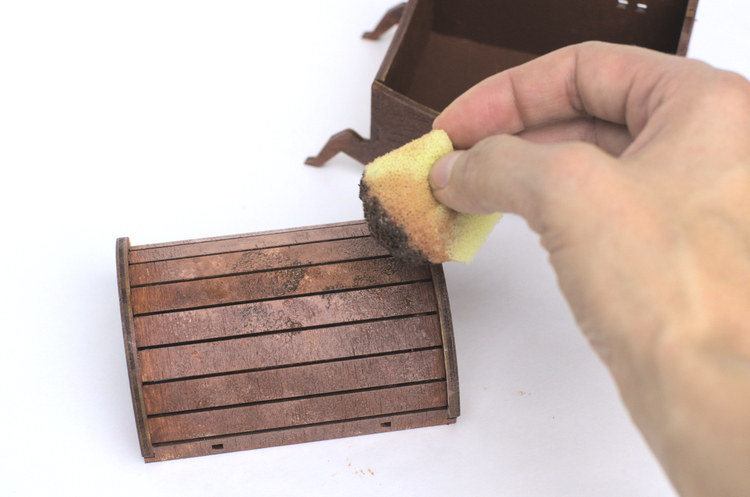
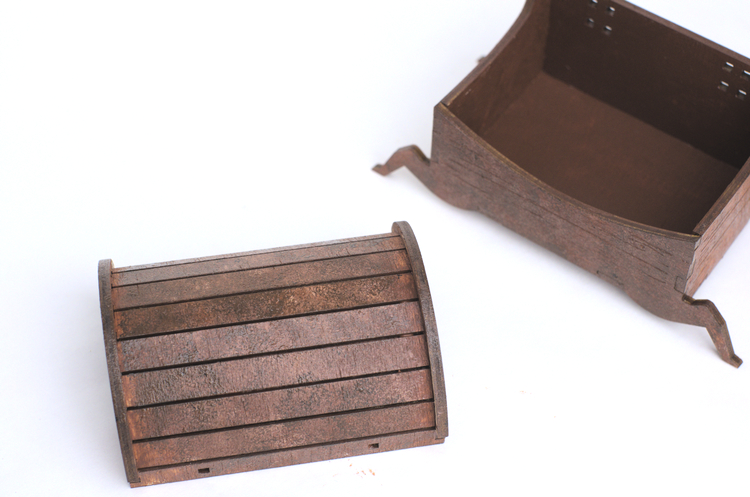
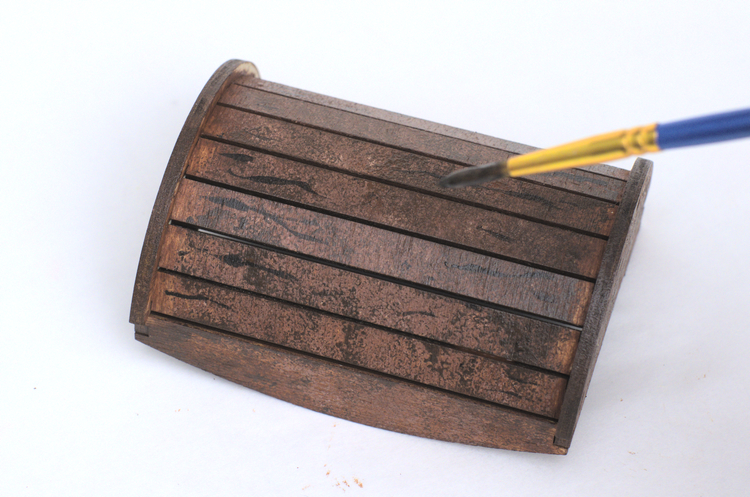
This technique creates a nice irregular texture but it also covers most of the engraved wood texture. To bring back the “wood grain”, I traced the engravings using a fine brush and an even darker brown than before.
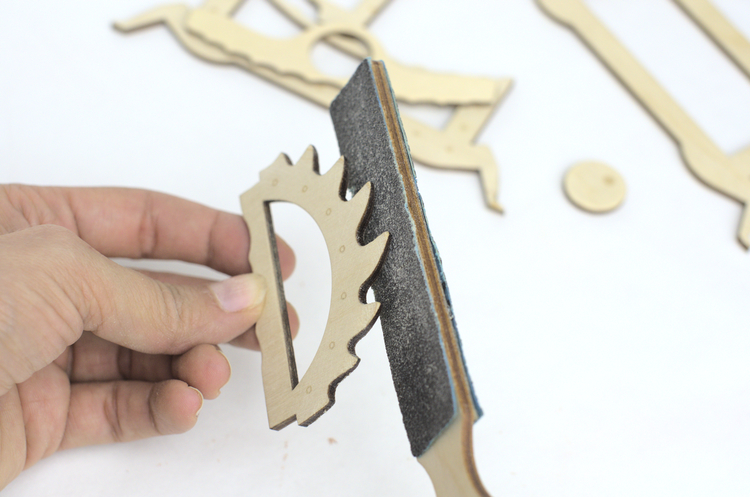
Preparation of the Outer Layer
I started by shaping some of the parts for the outer layer with sandpaper and different files. My main goal here was to make the part look a bit more organic. For example, I rounded the edges of the eye, the eye socket and the lips. I also filed the teeth and the horns (on the sides) slightly pointed.
At first glance, the changes are not big but I think they help give character to the final monster chest.
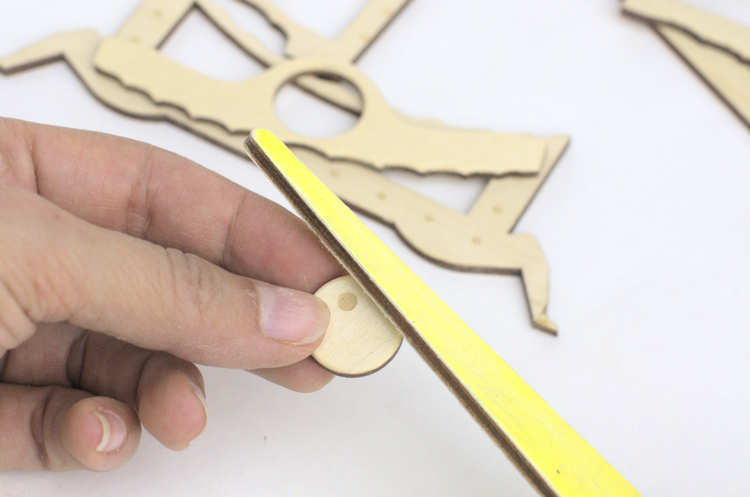
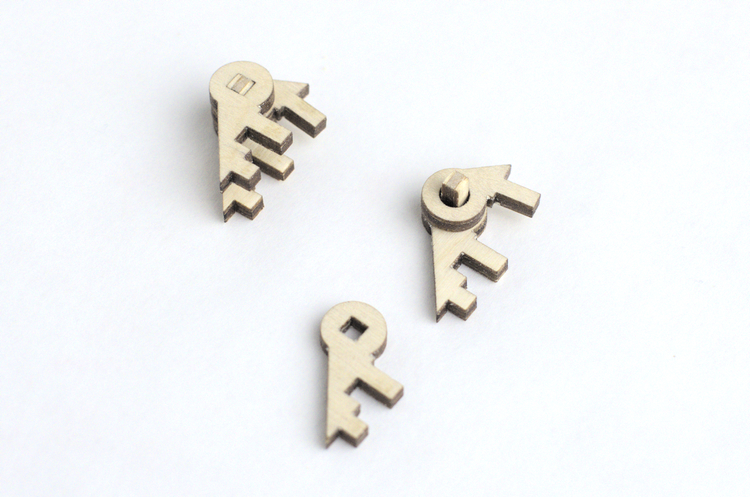
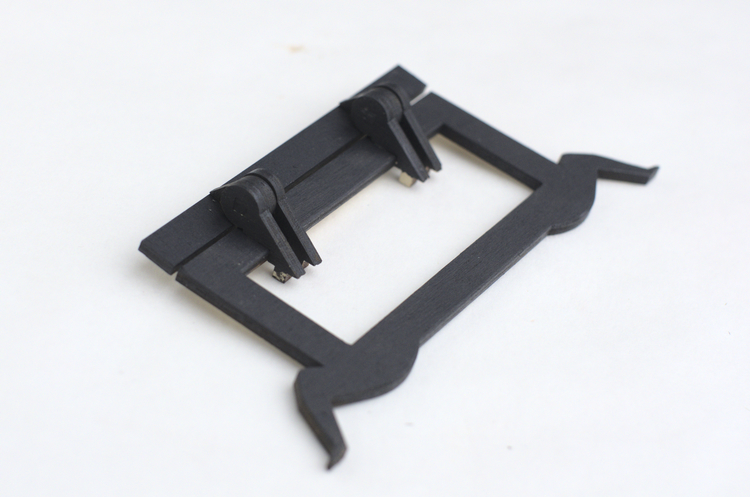
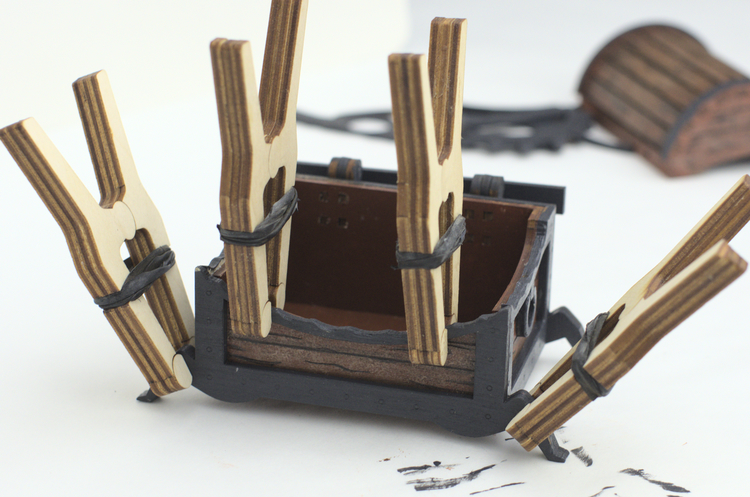
The top and lower half of the box are connected with hinges. There are two hinges and each hinge is made of four parts. To assemble a hinge you first need one of the parts with the rectangular cutout. Then put the little 3 x 9 mm pin into the hole. Next, place the part with the circular cutout over the pin. Pay attention that the orientation is the same as in the image below. Finally, place the second part with the rectangular cutout on top.
Make sure that the middle piece can rotate without much friction. If it can’t rotate freely you will have to take the hinge apart and sand down the middle piece slightly. Additionally, you can also apply some candle wax the make the movement even smoother.
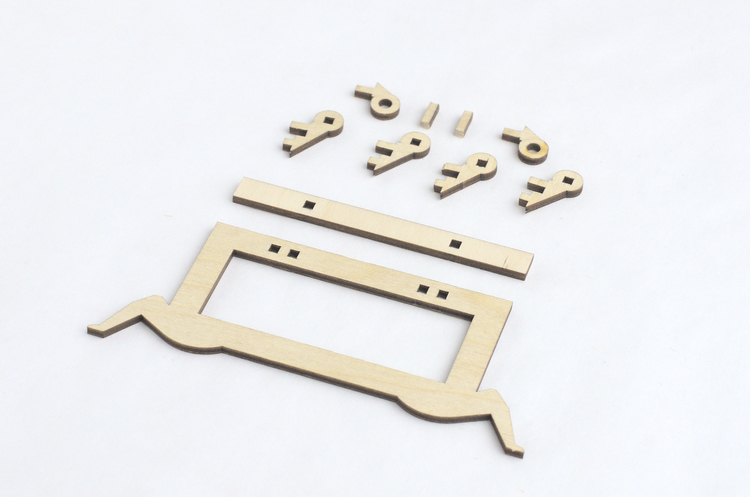
Lastly, connect the hinges with the two other back pieces as shown below. (Unfortunately, I forgot to take a picture of the assembled parts before painting, but I think it is still possible to see how everything fits together.)
Painting the Outer Layer
All of the parts of the outer layer, except for the eye, were painted with a dark gray.
When the paint dried, I glued the outer parts onto the parts of the inner layer as shown below.
The clamps I made some time ago out of plywood scraps were nice helpers with this step.
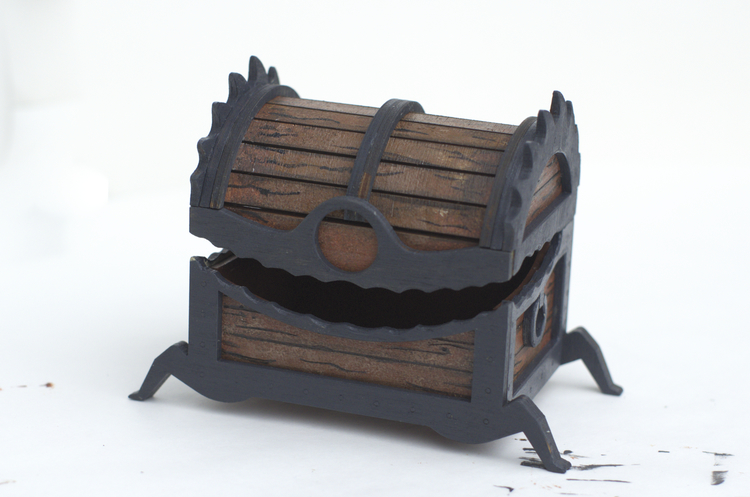
Above you can see what my monster chest looked like at this stage.
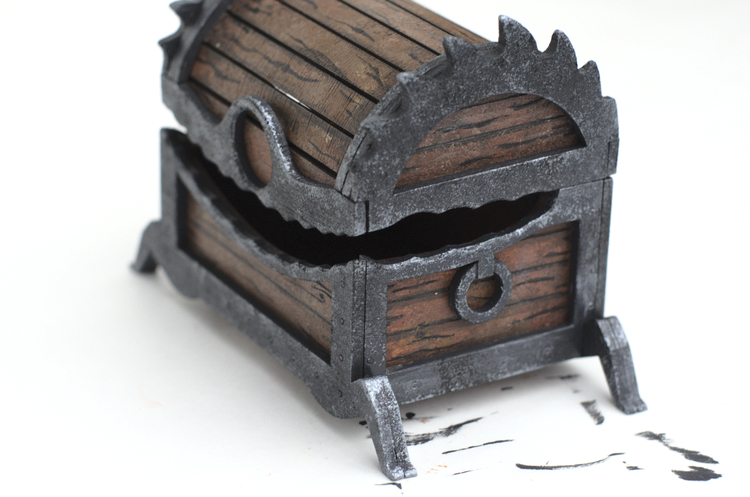
I used the same technique with the sponge again to add texture to the outer layer. Only this time I used metallic silver and dark gray as colors. With the silver paint, I focused on the edges because typically metal objects will be shinier on the edges where there is more wear.
I have to say, without an eye and teeth, the chest looked pretty creepy. Almost like the skeleton of a monster treasure chest…
In the last step, the chest is finally brought to life by gluing in the eye and teeth. I used the unpainted wood here only the pupil of the eye was painted black.
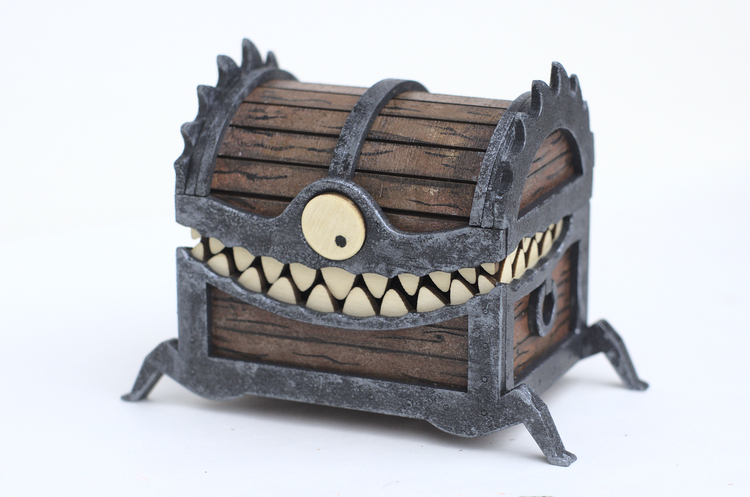
Final thoughts on my Monster Chest Halloween Box
I like how this project turned out. My laser-cut monster chest will be a great Halloween decoration. The only thing I am not completely happy with is the engraved texture. My engravings simply were not deep enough to really show after everything was painted. If I make this box again, I will slow down the speed of the engrave.
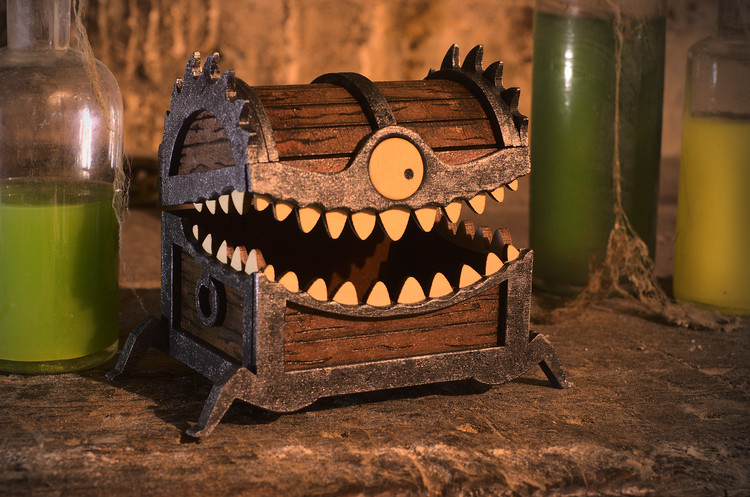
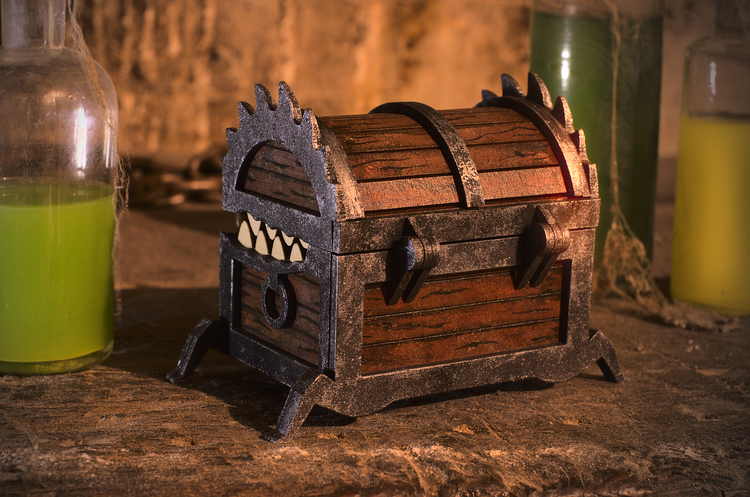
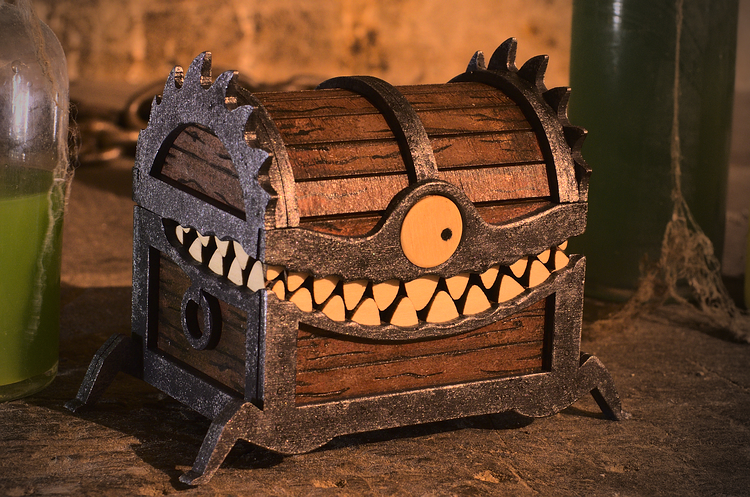
To finish – here are some shots of the completed monster chest in its natural habitat 🙂
If you made this project, I would love to see your version! Leave a comment below or let me know via Instagram.
Liked this Post?
Sign-up for the newsletter and stay updated on similar content!
Whow! It is great!
Amazing!! Love seeing all your projects! I just made your silhouette vases for our dining table. Thank you!
Hallo,
ich finde das Projekt sehr gut. Ich habe es versucht nachzubauen aber leider sind die Anbauteile bei mir zu groß und passen nicht auf die Box und Deckel. wo liegt mein Fehler?
Vielen Dank
Hallo Alexander,
meinst du die Teile für die Schaniere?
Great file! I was looking for something else and came across this, if ti is you good for you and if not you might want to notify the seller: https://www.etsy.com/listing/1340701979/monster-box-3mm-laser-cut-files-svg-dxf?click_key=62c4ea3ff397901171bad7a11ff3324bef3580b6%3A1340701979&click_sum=43a12477&ref=top_rated_narrowing_module_search-1&pro=1
Thanks for letting me know. The seller is not authorized to sell the file.
cooles Design. Würde ich gerne nachbauen.
Bin Anfänger und arbeite mich gerade in Lightburn ein.
Dabei stoße ich auf folgende Probleme:
1. Kann Gruppierung der Einzelteiole und deren Details nicht aufheben. Somit kein anpassen oder bearbeiten. Wie würdest Du das lösen?
2. Anpassung von 3mm Sperrholz auf 4 mm. Lightburn besitzt die Funktion “rezize slot in correction” die es können müsste. Wie arbeite ich damit? Bisher funktioniert es bei mir nicht.
Oder es liegt an der Sperrung des designs.
Danke! Ich habe auch vor kurzem begonnen mit Lightburn zu arbeiten (bisher habe ich nur Inkscape und Fusion360 verwendet). Ich bin also auch weit davon weg ein Lightburn Experte zu sein, aber ich denke ich kann dir etwas weiter helfen.
Zu 1: Du musst als erstes die Gruppierung lösen. Das geht in dem du das Design auswählst und dann im Menü auf “Anordnen” > “Gruppierung aufheben” klickst. Danach kannst du einzelnen Formen auswählen. Wenn du Details der Formen bearbeiten willst, verwende gehe auf “Werkzeuge” > “Knoten bearbeiten”.
Zu 2: Die einfachste Variante wäre hier alle Teile zu markieren und dann die Höhe und Breite auf 133,33% zu skalieren (eine Erklärung wie man auf die % kommt, habe ich hier geschrieben https://makerdesignlab.com/tutorials-tips/resize-laser-cutting-template-different-material-thickness/). Dadurch wird natürlich die ganze Truhe etwas größer.
Falls du das nicht willst, gibt es leider keine einfache Lösung. Über die Lightburn Funktion “resize Slot in selection” könntest du einen Teil der Ausschnitte anpassen, aber für eine komplett automatische Anpassung ist das Design zu komplex. Duch die zwei Lagen aus denen die Truhe besteht, müsste bei den meisten Teile auch die Gesamtlänge bzw. Höhe angepasst werden.
Falls du noch Fragen hast, kannst du dich gerne melden.
Awesomeness!
Do you have any limitations for those making the physical item (i.e : no monetary gain, edits, etc)?
Hi Stephani,
thanks for your comment 🙂
I share the Monster Treasure Chest file under a Creative Commons BY-NC-SA license (https://creativecommons.org/licenses/by-nc-sa/4.0/)
You are free to make edits or a physical item as long as it’s not commercial. If you want to sell the physical item, let me know and we can discuss a commerical license.