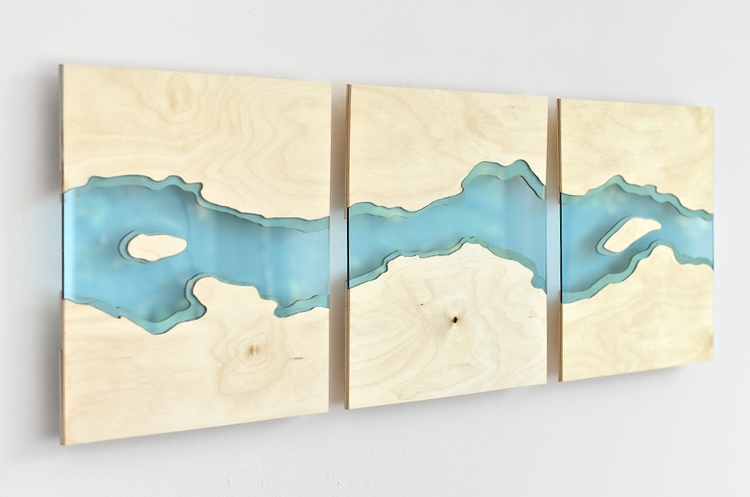
When you are browsing woodworking pictures from time to time, then you probably have already seen a couple of them: “river tables”. I love the look of the live edge wood in combination with colored glass or epoxy. For this project, I want to make a wooden wall art piece inspired by the style but using a simpler approach.
My river-style laser cut wall art is going to be made from plywood and acrylic. Acrylic is the perfect material for the “river” as it has the desired look, cuts very well, and is relatively cheap (compared to epoxy or getting custom cut glass).
Only a limited set of tools is necessary. I used a laser cutter to cut the plywood and acrylic but you can also remake this project using a scroll saw or fret saw for the cutting.
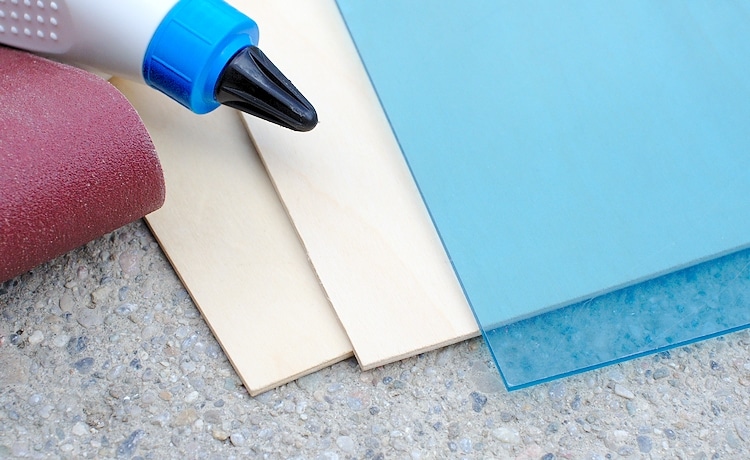
Material:
- 3 mm Birch Plywood (any similar wood will also work)
- 3 mm Acrylic
- Sandpaper (180/240/320 grit)
- Wood Glue
- All-purpose Glue
Tools:
- Laser Cutter, Scroll Saw or Fret Saw
- Belt Sander (optional, the sanding can also be done by hand)
Selecting the Wood
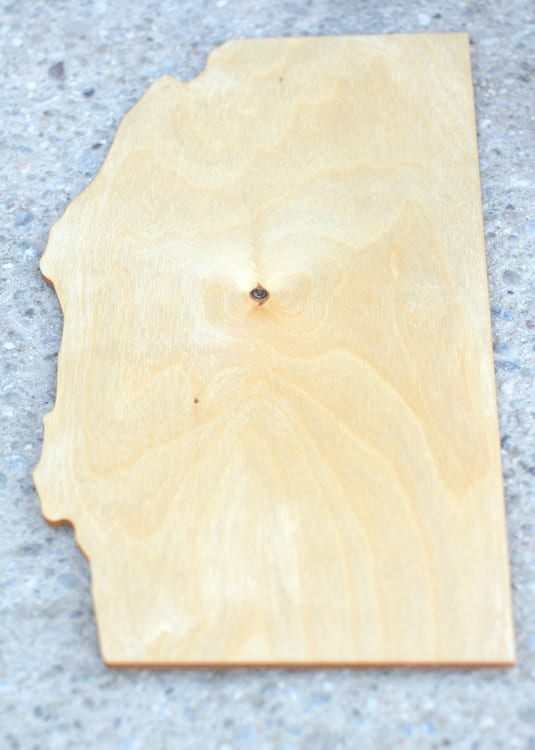
While for some projects visible knots or color variations in the plywood might be undesired – for this project I was actively looking for wood with some character. I wanted the natural grain of the wood to support the shape of the river.
Tip: When you buy your plywood at a store, browse through several sheets. Look at the grain and think where you could place your river. Also, look at both sides of the plywood because those can be completely different.
Creating the Wall Art Design
After I selected a sheet of plywood, I took a picture of the wood and then tried several design variations for the placement of the river. To do this I opened the picture in Inkscape and then draw different river shapes above the picture.
If you prefer to work analog you could place transparent paper over the wood and use it to sketch different shapes. Then you can cut them out to try if you like the look.
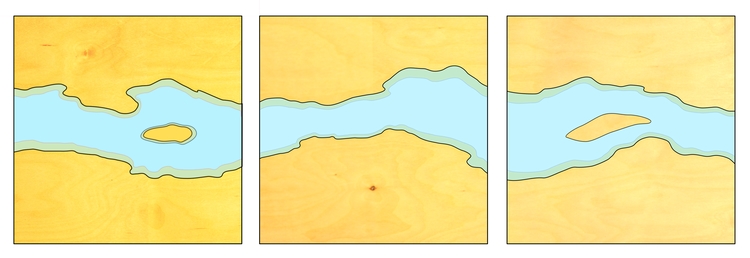
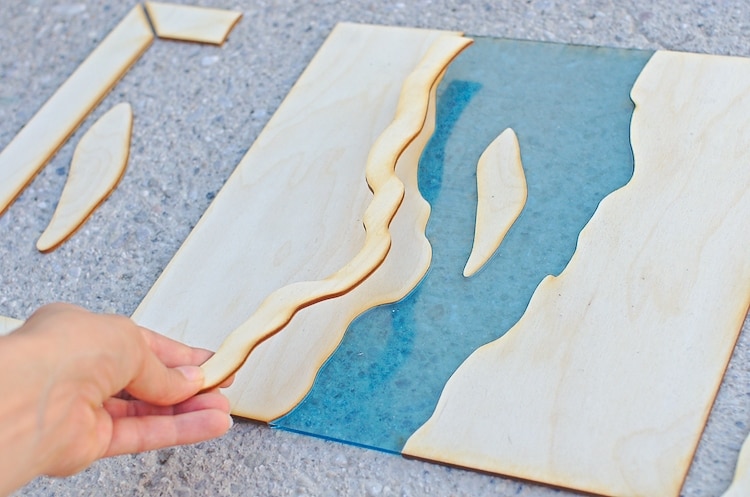
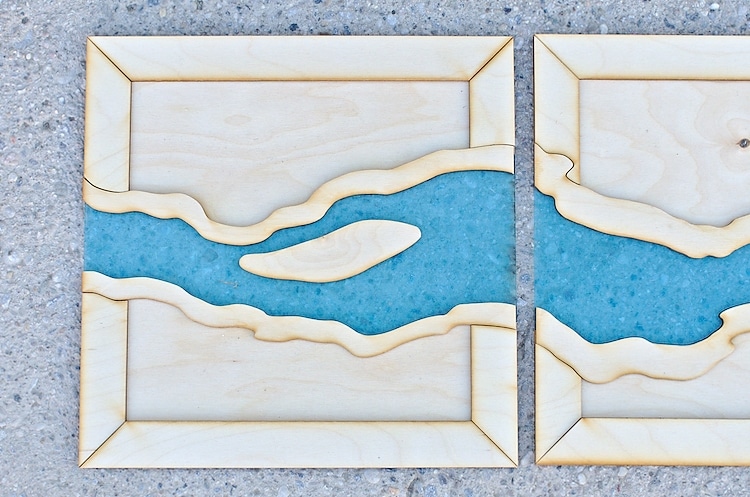
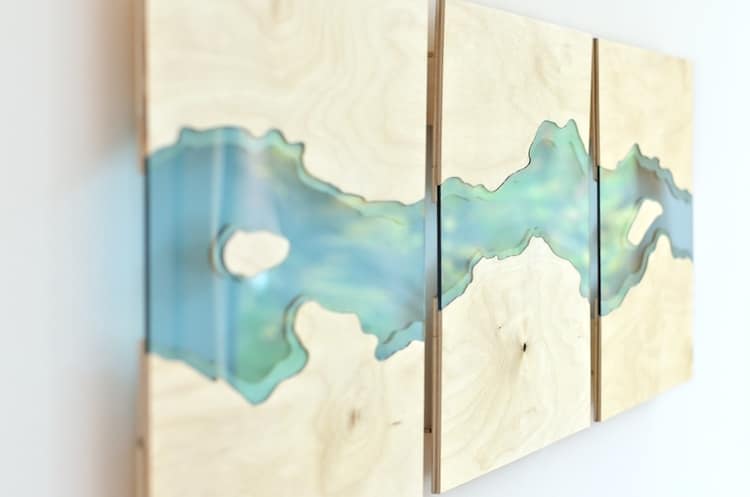
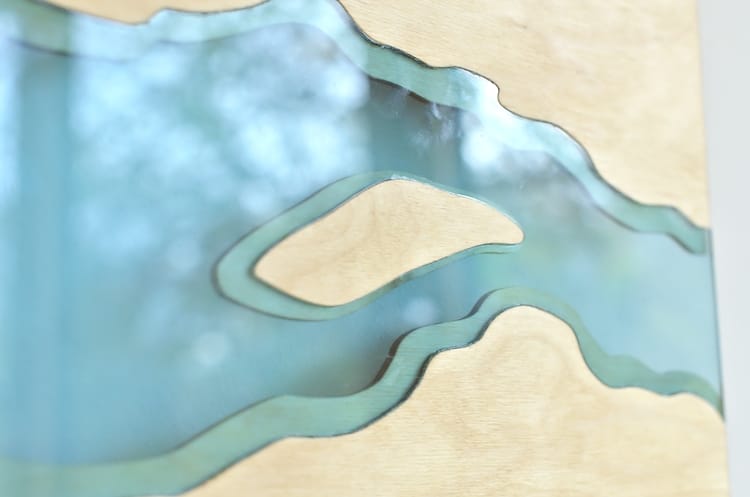
My wall art will be made of three square panels measuring 285 x 285 mm (11.2 x 11.2 inch). To add a dimension of depth, I decided to work with two layers of plywood. The second layer will be placed behind the transparent acrylic, creating a kind of river shoreline. This is mainly a design element but it will also help to hold the acrylic in place.
Designing the Frame and Distance holder
After I was happy with the design of the front side, it was time to think about the support structure.
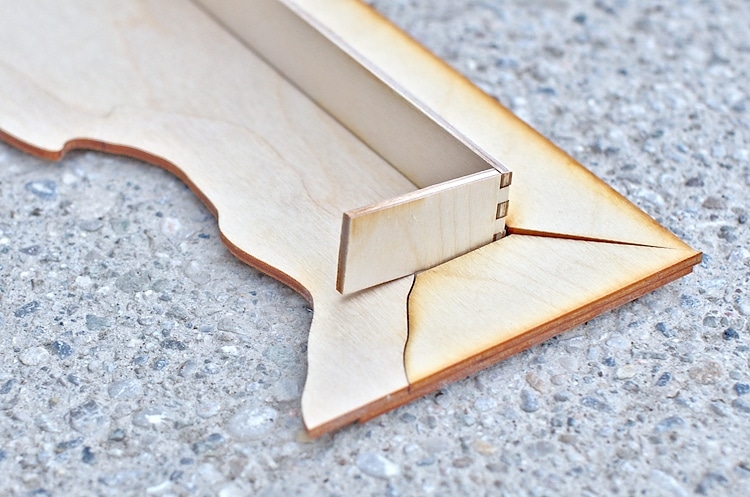
I wanted to give my panels a kind of floating look. To achieve this, two u-shaped distance holders will be placed on the back of each panel. I also decided to add a frame made from

Test Cutting and Final Design Adjustments
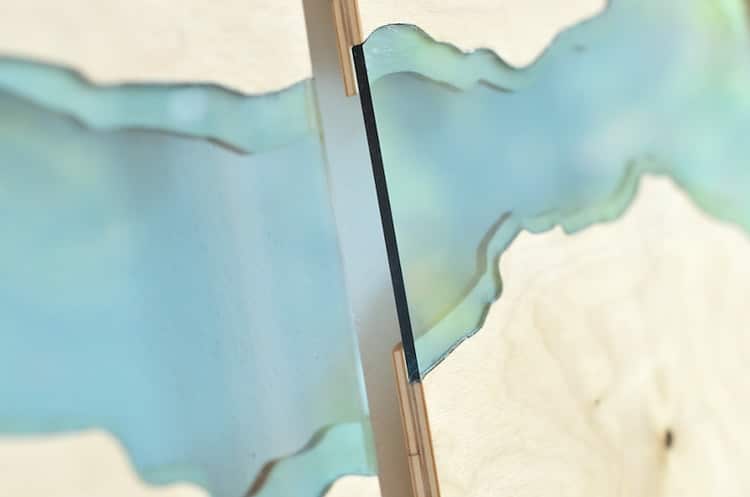
I wanted the plywood and acrylic to fit together as closely as possible without a big visible gap.
A laser cutter can cut fine detail but even with a laser, you have to account for the material that gets cut – or more accurately burned – away. You also have to consider that cutting with a laser produces a slightly angled cut. I did a few small test cuts to find out the best settings.
I finally added a kerf correction of 0.2 mm (0.08 inch) and I mirrored the shape of the acrylic before cutting. The kerf correction makes the design bigger to account for the material that will be cut away. Mirroring the design makes it possible to flip it to the other side for assembling and this way the angled edges will cancel each other out.
Kerf Adjustment With Inkscape
For the kerf adjustment with Inkscape, I set the line weight to my kerf width (0.2 mm / 0.08 inch), then left-clicked and used Duplicate. Next, I used the Path > Stroke to Path command. This will turn the outline of the duplicated shape into a new path. Select both shapes and use Path > Union to combine them into one shape again.
Below you can download my final files for laser cutting.
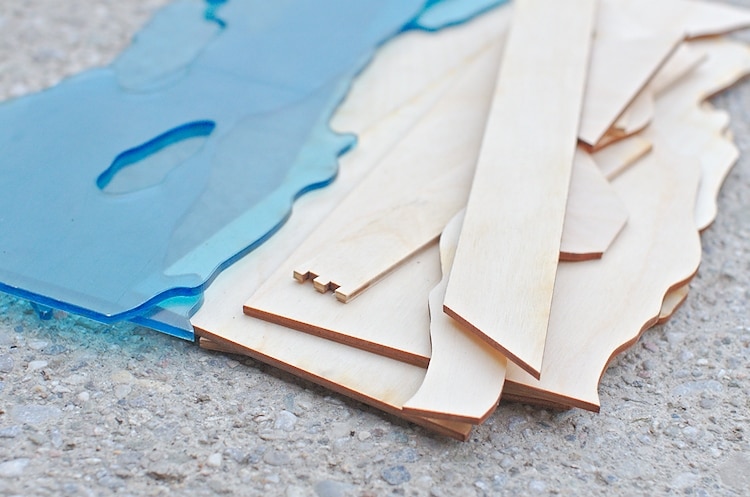
Cutting of the Plywood and Acrylic
I cut all the parts on a laser cutter at my local maker space. If you are using a saw for the cutting, I would recommend to print out the design on paper and glue the paper to the plywood using a non-permanent spray-on glue. Cut the individual parts and then remove the paper.
Be careful to have the right piece of wood aligned the right way before cutting. I put big post-its on every piece to not mix anything up and double
Test if Everything Fits… or Not
After cutting all the parts, I did a dry run to see if everything fit together as planned. I sorted the parts and lay them out on the floor. At first, all looked fine and I was happy how nicely the acrylic and wooden parts meshed but it turned out I made a little mistake.
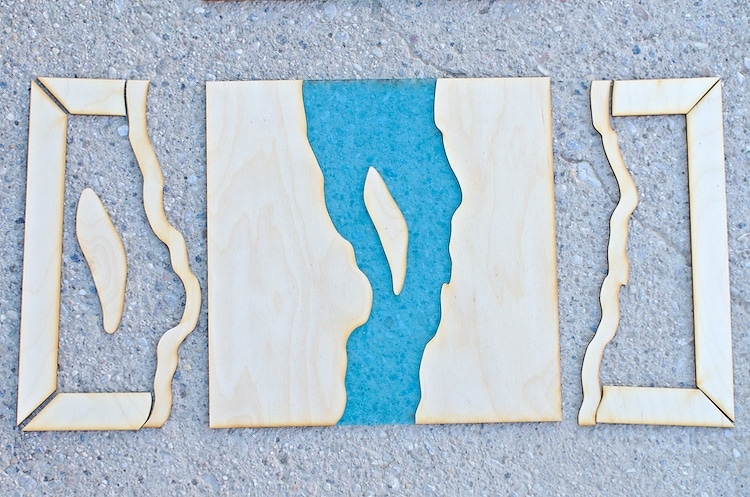
When I designed the distance holders, I did not take into account the width of the back layer shore line pieces. So for five of the distance holder legs, there was an overlap with the shoreline and they did not fit.
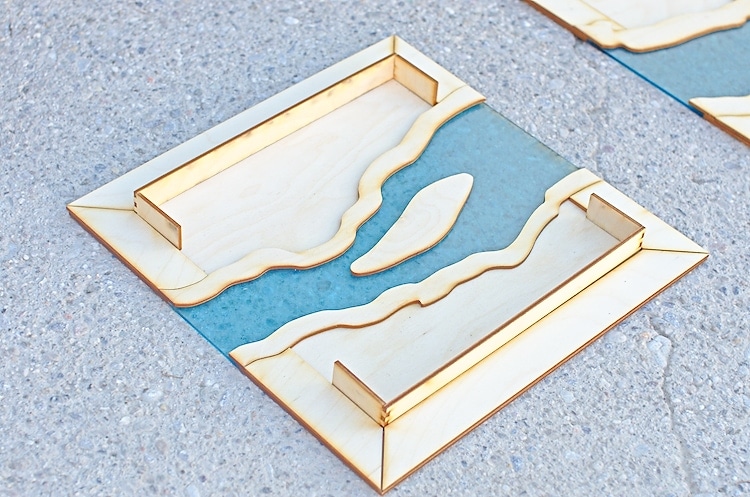
Luckily this is not too hard to fix. I could have redrawn the files and cut the parts again on the laser, but I decided to go the low-tech way and just use a small chisel to make the cut-outs in the five parts.
I corrected this error in the design files, so if you download them you don’t have to worry about it.

Sanding the Laser Cut Parts
From the images, you can see that there are burn marks on the wood after laser cutting. I could have covered the surface of the wood with masking paper to prevent this but as I was anyway intending to sand the wood to a fine finish, I skipped this step.
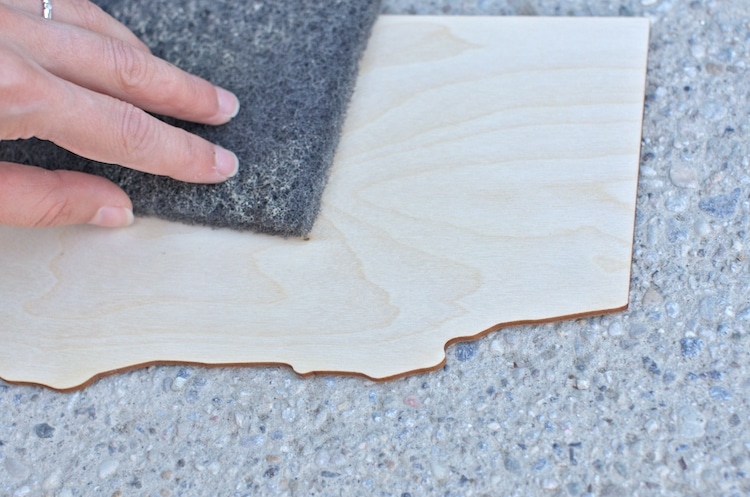
For the sanding, I started with 120 grit sandpaper and then went up to finer grits till 320. The main part of the sanding was done using a belt sander. Only for the finishing touch, I switched to hand-sanding. Afterward, I cleared off all excess dust using compressed air.
Oiling
I finished all the visible parts with linseed oil. This gives the wood a subtle shine and brings out the grain a bit more.
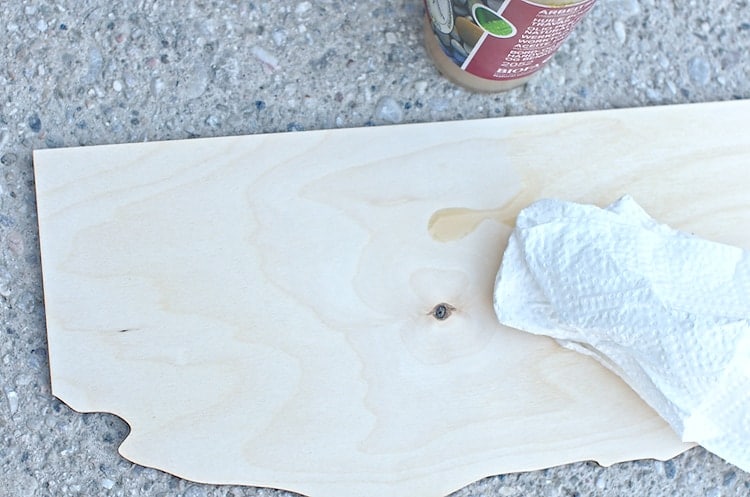
I did the oiling before the gluing because in the past I found that even if you remove squeezed out wood glue quickly, the oil will not penetrate these areas the same.
Gluing the Wooden Parts Together
Once all the finishing is done, it is time to finally put the parts together. I started by gluing all the parts of the back layer to the front layer and I also assembled the u-shaped distance holders by gluing two short pieces to each of the long pieces. For this, I used regular wood glue.
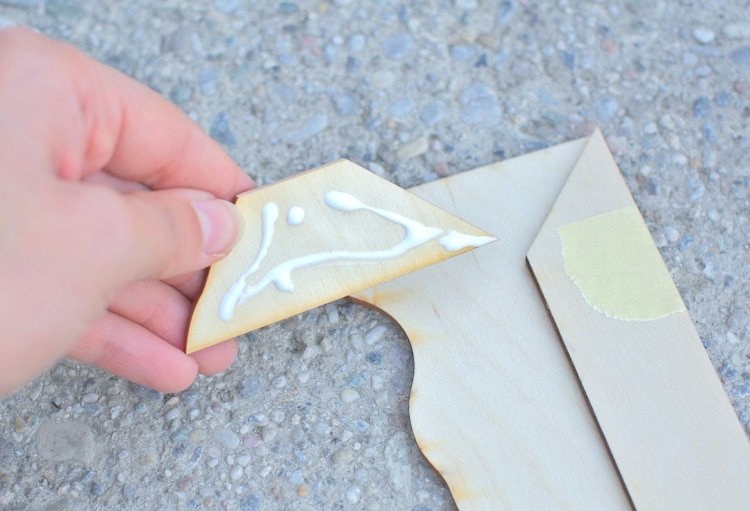
I don’t think there is a way to avoid glue squeeze out completely. To minimize it I used an old paintbrush to apply gue to small parts and cleaned up excess glue with a wet rag.
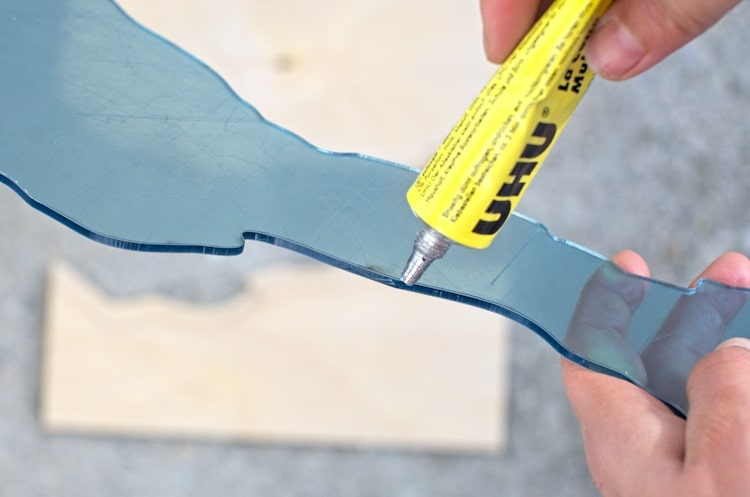
Combining the Acrylic With the Wooden Parts
Next was to combine the acrylic with the wood. I was not sure which glue would be most suitable for this job. I just knew that I wanted the glue to be as invisible as possible and so just took some wood and acrylic scraps and tried super glue and all-purpose glue, which both are transparent when dry.
Both held together reasonably well but when I put them into stress test by trying to pull the pieces apart and wiggling them around – I found that the super glued parts came apart more easily and so decided on the all-purpose glue.
Another advantage of the all-purpose glue is that due to the slower drying time excess glue can be removed from the wood by just rubbing it off as long as it has not hardened.
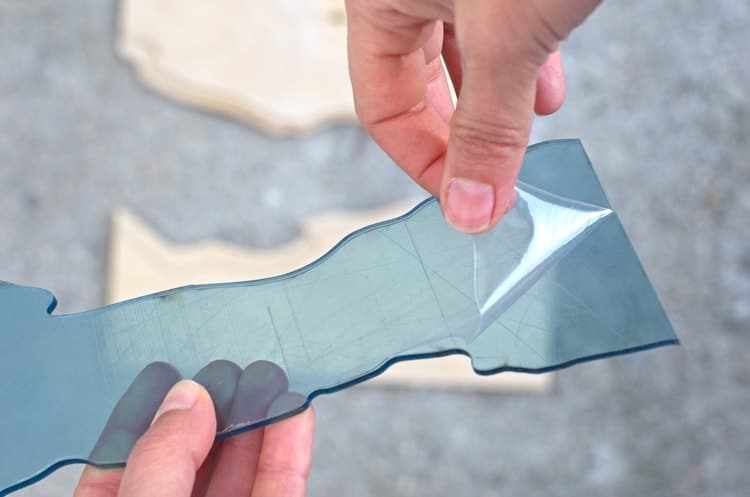
I took my time when applying the glue to the acrylic trying to spread it into a thin even coat all along the edge. Note that at this step I still have the protective foil on the front-side of the acrylic. That way I don’t have to worry about ruining the surface by mistakenly smearing glue over it.
I still ended up with some glue smears on the back but found that nail polish remover can be used to get rid of them.
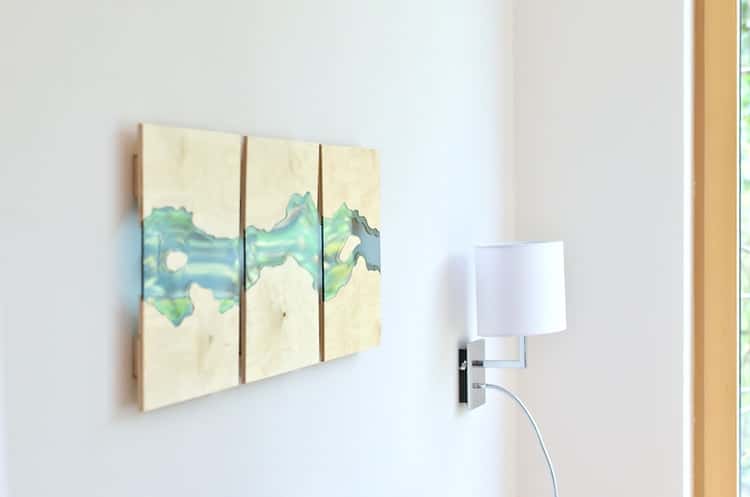
Time to Put the Laser Cut Wall Art on the Wall
All that is left to do now is to mount the wall art on a wall. I hope you enjoyed the project. I am pretty happy with the final result. Final photos and some detail shots below!
Awesome art! Do you sell?
Thanks! Currently I just made those three panels but maybe I’ll make more in the future.
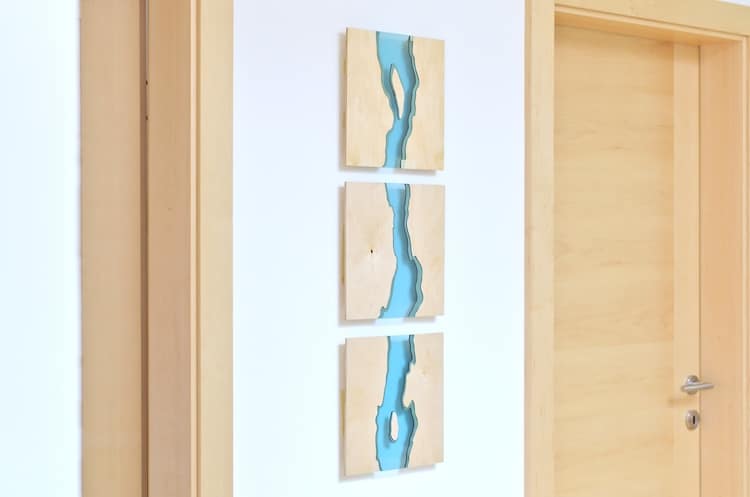
I like the vertical. Very nicely done, and thanks for the write up.
Thanks, I actually mounted them vertical 🙂
This is beautiful! Any chance you would be willing to do a commissioned piece?
Thanks! 🙂 I wrote you a message regarding comissions.
How can I download the template onto paper to use as a template to use a fret saw?
The best way to print depends a bit on the software and printer size you have access to. The easiest way is to download the PDF file and open it with Adobe PDF reader. In the printing dialogue, there is the “poster” option. This makes it possible to print a larger format document, split across multiple sheets of paper. Set your paper size and the scale you want to use. I would also set an overlap (as most printers can’t print all to the edge of the sheet) and select cut marks to make aligning easier. If you have any vector editing software you can also use the SVG files and arrange them to fit your paper size.