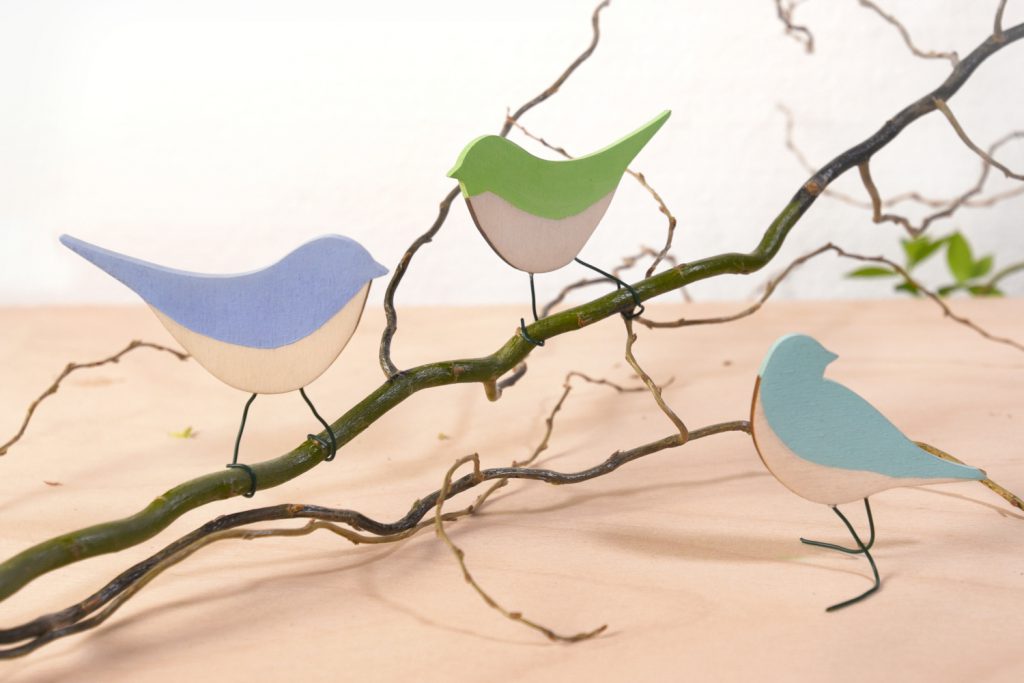
The days are slowly getting longer, temperatures are rising and one can feel it the air – spring is approaching. It will still take some weeks till all the birds will come back from their wintering grounds so I decided to make my own little birds from wood to bring some spring vibes into the house.
The wooden birds will have legs made out of wire which makes it possible to attach them to branches or other objects. The project is pretty simple and is also a great craft project to make together with kids.
Material:
- 4 mm Poplar Plywood (any similar wood will also work)
- 120 grit Sandpaper (optional)
- Glue
- Wire
Tools:
- Laser cutter, Scroll Saw or Fret Saw
- Paint Brush
- Drill
Creating the design and cutting the shapes
I started by collecting some images of birds and then traced their silhouettes in Inkscape. Afterward, I did some cleaning up to simplify the shapes and tweaked them a bit until I was happy with the way they looked. The bird shapes were cut out of 4 mm poplar plywood using a laser machine. (If you want to get started with laser cutting – have a look at the Beginners Guide to Laser Cutting.) The silhouettes of the birds are not too complicated so they can also be cut using a scroll saw or fret saw.
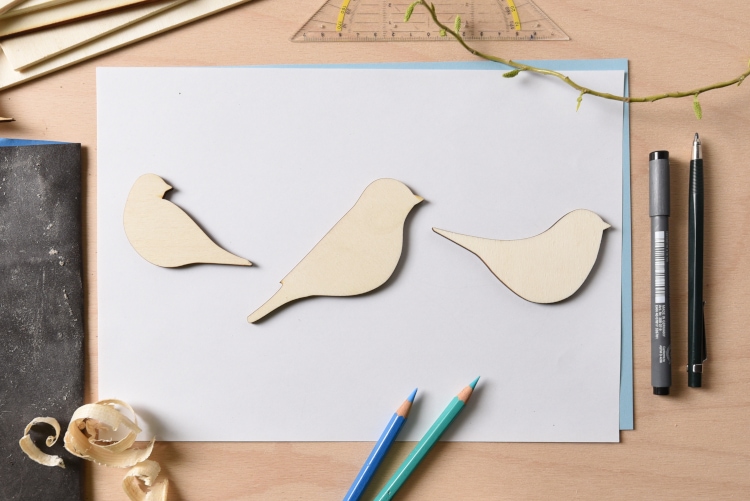
I made three different bird shapes. You can download the template with the patterns as PDF or SVG below.
Adding some color to the wooden birds
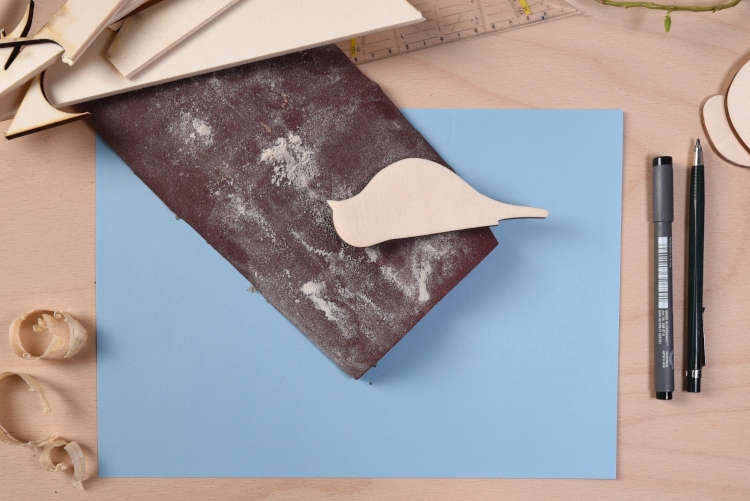
Before starting with painting, I did some light sanding of the surfaces with 120 grit paper. The sanding can be skipped if you prefer a rougher look.
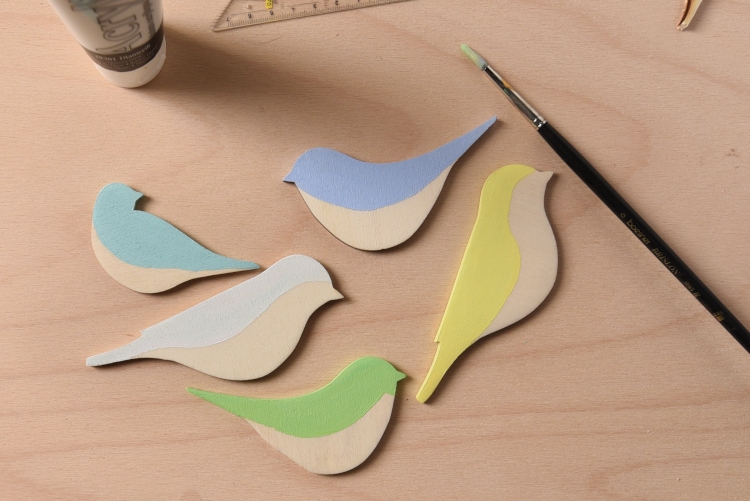
To color the birds I used acrylic paint. Acrylic paint is cheap (no need for artist grade paint in this project), mixes easily and dries quickly. I only used white, yellow, blue and green as base colors and mixed them together to get the colors I wanted.
Make sure you pre-mix enough color for the area you want to paint because it can be difficult to achieve the exact shade of color again. I used a thin line I draw onto the wood as a guide for the painted area.

The acrylic paint has a quite high opacity. One coat of paint covered the wood nicely. Only on the edges which were darker due to the laser cutting, I applied a second coat for a better-looking finish. After about 10 minutes the acrylic paint is dry and everything is ready for the final step.
Attaching the wire legs
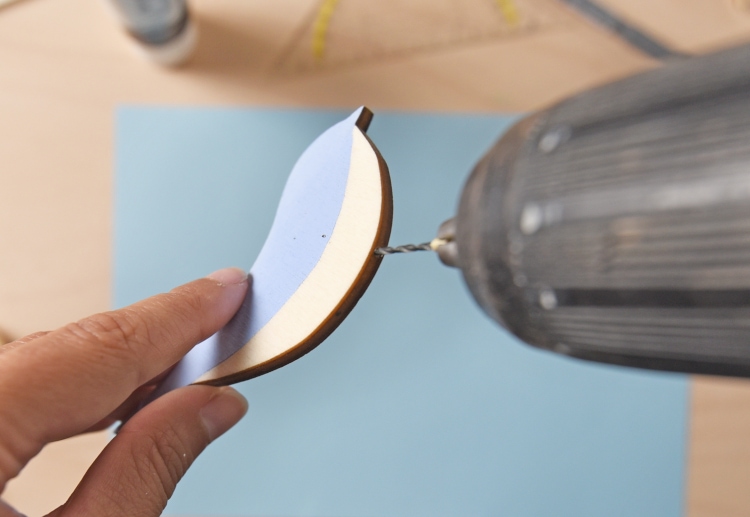
For the legs, I used some wire I already had at home. It was about 1.5 mm (0.05 inch) in diameter and coated with green plastic. I started by cutting the wire into pieces of about 8 cm (3 inch) length.

Then I used a 2 mm drill bit to drill out the holes for the wire legs. The drill bit was a bit bigger than the wire itself to that there would be some space for the glue. Poplar is a very soft wood, so it was no problem making the holes simply holding the bird and then slowly drilling into the wood.
Take care of your fingers here! The safer way would be to clamp the bird in a vise and then do the drilling.
To glue the wire into the holes I used wood glue, but I suggest using superglue as the wood glue does not adhere well to the wire and I had to re-glue some of the legs.
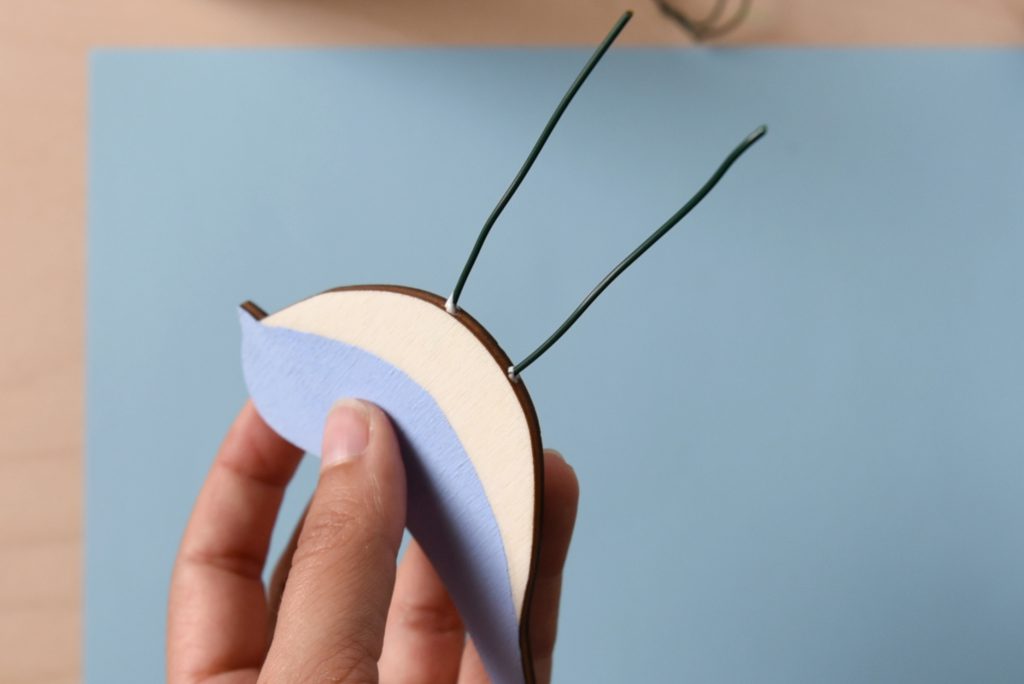
Once the glue has dried the birds are ready for placement. With the wire legs, there are a lot of attachment options. Have them sitting on a branch, the rim of a flower pot or just bend the wire in too little feet.
I hope you liked this project. Feel free to ask any questions and post feedback or suggestions in the comments below.
If you make your own versions, I would be happy to see some pictures of your birds!